
|
|
BMW Airhead & K bike Motorcycle Brakes.
Stock drum brakes, stock disc brakes.
|
The main article, beginning in the NEXT section, covers Airheads [and early K bikes ...including, for the most part, type 1 ABS]. The Main Article does NOT include flushing and bleeding of type 2 and later ABS brakes...the Integral ABS brakes...except that the information in the main article covers basics...and some hints...that apply to all disc brakes, that you may find of good value. For those with Type 2, etc., ABS equipped bikes, I have gathered some article links for you: http://users.rcn.com/dehager/service/service_abs3.pdf http://users.rcn.com/dehager/service/abs3_filling_adapter.pdf |
MAIN ARTICLE:
The below extensive article covers both disc & drum brakes. There is considerable information for 2-wheelers & some for sidecars & tugs. There is a complete discussion about brake fluids & bleeding. Much of this article is applicable to ANY hydraulic brake system. Included is squealing information for motorcycles, especially Airheads, other bikes, and Bulletins for K-75, etc.
Warning! Working on brakes is serious business. Read this entire article, perhaps more than once, before you begin work on your brakes. If you do not feel competent, take your bike to a qualified shop.
Broken cable or lever operated brake switch? (NOT the hydraulic switch). Brake pedal bolt not contacting the switch properly? (and it's not a bent tube at the frame): https://bmwmotorcycletech.info/brakeswitches.htm
Regarding the hydraulic pressure activated brake switches: Those switches, originally 34-31-1-233-959, were replaced with 61-31-1-244-334. If you haven't access to the BMW part, you can probably substitute the switch used on old VW Beetles. Napa carries that switch as number SL143.
FRONT DRUM BRAKES:
An article written by Duane Ausherman discusses assembly & adjustment of the front drum brakes. I suggest you review this article, which has photos. https://w6rec.com/5-front-drum-brake-adjustment-and-repair/
In my article that follows, below, I have numerous sections where I get into things Duane did not, regarding the drum brakes.
BLEEDING, FLUSHING, BRAKE FLUIDS, PRELIMINARY:
Brake bleeding should be considered a "NORMAL YEARLY MUST-DO" maintenance item. It is usually easy to do, & hardly has any problems .....if you do it correctly.
Failure to do this thorough bleeding at least every other year, in which nearly all of the old discolored fluid is properly bled out of the system & replaced by fresh fluid, will likely eventually cost you a lot of money, & COULD cost you your life if you let things go for a very long time. Once deteriorated enough due to neglect, on-coming problems WILL get worse at an INcreasing rate.
Some, including dealer technicians, will simply change the master cylinder reservoir fluid. Some might just do a very quick one or two brake lever pumping bleedings. These are VERY BAD ideas! Failure to change nearly all of the fluid by properly bleeding the brakes may eventually cause the brakes to bind, seize, & MIGHT toss you over the handlebars. Certainly, as brake fluid ages, the corrosion-preventing additives are used-up, or deteriorate, deterioration of the master cylinder metal walls will begin ...with pitting ...which, when to the noticeable point, will EAT UP the seals, often destroy the master cylinder, causing it to need either replacement $$$$; or, honing and rebuilding and even sleeving $$. All for the sake of a few minutes of labor and a can of brake fluid, which is cheap!
Conventional (DOT3, DOT4) brake fluid absorbs moisture, which CAN be enough (especially in coastal climates) to start corrosion in the caliper & master cylinder, and those conditions can lead to costly parts replacement, or worse! On average, water accumulates in the brake fluid at up to 1% per year. It will not accumulate very fast in a metal can with a metal cap, fairly tightly sealed, if the can is not opened for long periods; or, too often. A half-hour in a humid climate might be the limit, for the total time. Don't use the 'new' fluid if it has changed color.
As the fluid absorbs more & more water vapor from the air, the BOILING point DECREASES. If the fluid in the caliper EVER boils due to hard braking (or, heat from pads that are not fully releasing) , YOU COULD DIE, due to ZERO BRAKES in a bad situation. DOT 3 & DOT4 brake fluid DO absorb moisture, right through places in the braking system you would think it could not be so! Those places RARELY ever leak noticeably! The yearly change/bleeding of fluid is the method you MUST use to get rid of contaminated old fluid.
Conventional glycol brake fluids, such as DOT3 & DOT4, are hygroscopic. That means that they absorb water vapor from the air. Water vapor can get into your brake fluid from molecular sized cracks, fittings, hoses, connections, etc. These places DO NOT have to show leaks, in order for water molecules to get into the fluid. Brake fluid typically absorbs very approximately 1% of water, PER YEAR. It can be MUCH WORSE! In many Airheads, however, it is far less, as the system is more closed than many, and the % numbers includes older cars, some of which are not 100% sealed against air entry to the MC. Besides regular maintenance brakes bleeding, another problem has been that the owner that pays little attention to anything but the fluid level in the master cylinder. That level should normally DROP over a long period of time, as the brake pads wear, & it takes more fluid in the caliper to fill the space the piston previously occupied. Thus, over time & miles, the LEVEL of the master cylinder fluid is not a good indication of anything except, perhaps, that the fluid level is adequate, & maybe you can guess at the fluid age by the color. It is entirely possible for pads to wear, & the fluid level NOT go down, due to accumulated water! THAT is hardly ever discussed.
In general, BMW front brake pads tend to wear VERY SLOWLY, and the rear DISC pads tend to wear much faster. Some of this is because of the rider's habits, but even with good use of the brakes, the faster rear wear is normal. It is my guess that part of this has to do with position (dirt, including atmospheric dirt, coming rearward; and, the heat generated by the rear drive being somewhat transferred ....and we ALL know (??) that chemical changes speed up with temperature increase (~ double the changes or double the deterioration, per every 10�C). Some riders tend to use the rear brake a considerable amount, instead of using the front brake as much as BMW recommends ....and good form demands. If the pads are wearing very unevenly (meaning, much thinner on one side of the caliper than the other side of the same caliper), then something may not be correct. A caliper piston may be corroded or otherwise sticking, or there may be otherwise damaged or worn/aged parts.
As water accumulates in the brake fluid, the BOILING point of the fluid decreases as I noted. Brake pads HEAT UP when you use the brakes. THEY CAN HEAT UP A WHOLE LOT. If the fluid boils, it means there is STEAM being generated. STEAM is compressible, & your brakes will DISAPPEAR, more or less. FURTHER, water contaminated fluid will ....not maybe will ....cause all sorts of corrosion problems with your braking system once its % is high enough. These will be EXPENSIVE problems. One of the first places corrosion will usually show up is sticking caliper pistons & thereby sticking and overheating caliper pads. That also wears out the $$$ brake disc. Another corrosion problem place is the bore of the master cylinder ....pitting will occur & soon the MC will fail. All these $$$ things will happen, for failure of a cheap can of brake fluid, perhaps once every year, or not later than 2 years. If you have a BMW model with ABS, the eventual cost to you for not bleeding the brakes will be very high.
DOT3 fluids have a slightly different base chemistry, & are less tightly controlled, than other DOT brake fluids. Said another way, DOT4 fluids have a borate-ester additive & a few other small changes. I presently know of no incompatibility between either type, & any BMW bike braking system parts. DOT 4 and/or DOT3 would, in practice, likely be OK; but safest is to use the fluid specified by the motorcycle manufacturer. Any brand of DOT4 is also likely going to be OK, EXCEPT that I recommend one NOT purchase super performance brake fluid that typically says "racing" or similar, on the container. Those 'racing' fluids are usually the same BASE of glycol-ether, but could be borate-ester, & almost certainly CONTAIN a borate-ester type similar to DOT4, but are NOT THE SAME. They have an advantage for some types of racing where high brake use, ETC., will possibly heat the brake fluid to very high levels; they are also sometimes called DOT5.1. Note that 5.0 is silicone, and 5.1 is mostly performance glycols. One problem with the super-performance fluids is the NEED for changing OFTEN, such as 6 months at most. Another, allied problem, is that they do deteriorate FASTER.
Side note: Back in the OLD OLD OLD days, some used to save old brake fluid, and use it in a spray bottle, to put onto under-chassis rubber parts in cars and trucks.
DOT5 (silicone based) is NOT THE SAME as DOT 5.1 ....DOT5 IS NOT COMPATIBLE WITH YOUR BRAKES. I HAVE NO DESIRE TO GET INTO ARGUMENTS ABOUT SILICONE FLUIDS. I AM NOT INTERESTED in anecdotal comments NOR am I interested in any arguments. I will make a flat out statement here: DO NOT USE SILICONE BRAKE FLUIDS IN YOUR BMW motorcycle! Silicone fluids have many bad things that can happen, including microscopic air bubbles, frothing, foaming. Water vapor gets inside from temperature changes, does not mix, and may form globules of water, that can turn into steam under hard braking...and you then have no brakes. Those that insist on installing silicone fluid should be exceptionally careful to replace, not just clean, all rubber parts (the rubber parts do absorb some swelling agents and some of the glycols), and not to shake the silicone fluid container....in fact, before bleeding, you should let the filled system sit a day or so, even with the MC cover off (but covered by a cloth to keep dirt out). YOU are the test pilot if you use silicone fluid. There is MORE on silicone brake fluids a bit later in this article!
Most, or all, of the SUPER PERFORMANCE fluids (Racing, High Performance, and even 5.1) have exceptional love for water molecules, may well have much less corrosion protection; and, if not changed often, WILL damage your braking system. They also lose their exceptional temperature abilities VERY quickly with time and use.
5.0 Silicone fluids are not compatible with Brembo brakes, and very iffy with ATE swinging caliper models, and there are special and BAD things that can happen with silicones. DO NOT USE THEM.
The fluid best likely to meet specifications will come in a METAL can, as the plastic cans are good, but VERY long term (many years) storage is iffy with plastic containers.
NERDY: The U.S. Government specifications for brake fluid, FMVSS 116 (guess what DOT means with regards to 116) do not dictate the chemical composition of a given classification, or "grade" of brake fluid. Instead FMVSS116 defines the properties of the fluid, such as dry and wet boiling points (referred to as the equilibrium reflux boiling points, dry and wet), viscosity of the brake fluid grade at certain temperatures, high temperature stability, corrosion characteristics, and the effects of the fluid on seals, as well as other physical properties like the tendency to jell or separate (called stratification) or form sludge and/or crystalline deposits. Boiling point and viscosity are the most relevant properties to most users, including high performance users; but they should really be also concerned about life and corrosion protection, etc. Viscosity is an important factor for proper operation of ABS & Active Handling Control systems on modern vehicles since in most cases the pressure & volume of fluid transferred is not measured. Instead, flow through a valve with a given orifice size over time are the control mechanism, so fluid maximum viscosity is a key characteristic for them.
DOT 3 fluids are usually glycol ether based, but that is not because they are required to be. The brake fluid industry has determined by consensus that glycol ether fluids are the most economical way to meet the requirements. By definition, DOT 3 fluids must have a minimum dry boiling point (measured with 0 percent water by volume) of 401�F and a minimum wet boiling point (measured with 3.7 percent water by volume) of 284�F. The specification says little more as far as the performance enthusiast is concerned. By FMVSS116 standards, DOT 4 fluids must have a minimum dry boiling point of 446�F and a minimum wet boiling point of 311�F. DOT 4 is better than DOT3 if you are really hard on the brakes; and slightly better if you don't change fluid yearly.
Nerdy: A seldom talked about characteristic is that because of the chemistry, DOT 4 fluid will have a more stable and higher boiling point during the early portion of its life, but ironically once the fluid does actually begin to absorb water its boiling point will typically fall off more rapidly than a typical DOT 3. It is for this reason that while I like both DOT3 and DOT4; if I am not being terribly hard on the brakes, I slightly prefer DOT3, but it is not as easy to find these days. I am well aware that BMW is specifying DOT4 fluid (look on the top of your master cylinder) ....BMW ASSUMES you will do scheduled fluid replacement. These are really nerdy points, more for discussion than practical use; and, I recommend you use DOT4, as it is easy to find, works well, and you only have to bleed the brakes once a year (but, thoroughly!). DOT4 is usually good enough even for amateur racing.
ANY place inside the caliper where the temperature rises to a critical level is enough to create bubbles. Just under the piston top is a favorite place for this to happen. Plenty of bubbles = NO BRAKES, because bubbles are highly compressible, even tiny ones. BECAUSE SO LITTLE FLUID IS ACTUALLY MOVED DURING BRAKES USE, A SMALL BUNCH OF TRULY SUPER-SMALL BUBBLES ARE ENOUGH TO CAUSE QUITE SPONGY BRAKES.
Racing fluids may have viscosities that are not good for your BMW ....that is, they may be too thick. You really DO want the fluid to return, fast, to the master cylinder at your brake temperatures.
In MY opinion, the absolute limit for brake fluid changing for a bike, with NO USE AT ALL, is 3 years. For very MINimal use, and stored in a garage, I suggest an absolute maximum of 24 months. Those who ride or store or park in a lot of humid weather, particularly with wide temperature ranges the motorcycle is exposed to, should possibly change at even LESS than yearly changes. For MOST of you, once a year is good. Brake fluid is VERY cheap compared to new parts or trying to overhaul calipers and/or master cylinder; or to re-sleeve a master cylinder.
An amazing amount of paint damage can happen if you bump into the front end while doing a bleeding job and the cover is off or sitting on the master cylinder. Be careful. Have wet rags IN PLACE, not just 'handy'.
It IS BEST to change brake fluid on a schedule. I personally do it as part of my pre-Winter pre-storage service. For longest brake system life, your brake fluid probably needs yearly changing, as it attracts moisture, right through the NON-leaking lines fittings areas & air enters the master cylinder bolt & screw fastenings, etc. Some systems are worse than others at this. TYPICALLY, but NOT always, contaminated brake fluid changes from clear to a very light straw, then light tan, then light brown. You cannot, 100%, depend on fluid color in the master cylinder, to tell you if the system needs bleeding!
To speed up the bleeding process, obtain a rubber baby-sized ear syringe from the drug store. Use it to remove most, but NOT all, of the fluid in the brake reservoir, replacing it with fresh fluid, before you start bleeding. I remove all but what is in the bottom depressed hole area. Be careful using the rubber syringe; DO NOT let it squirt OUT when withdrawing it from the MC to dump it into your junk fluid container. You DO have wet towels wrapped around the master cylinder and fuel tank, etc. ??
STOCK BMW brake hoses are of VERY high quality & can last a VERY long time if they are not abused. Abuse means such as hanging a brake caliper by its hose, which can KINK the tiny internal plastic tubing. 20 or 30 years is NOT AT ALL UNCOMMON!...and I have seen them even older that were still very flexible and in good condition. For SEVERAL reasons, stainless steel braid covered aftermarket hoses, often promoted for profit reasons, may be WORSE than the stock hoses! I will get into this topic later.
In a previous version of this long article, I fully explained in more depth, how to use, store, etc., DOT3, DOT4, and 'race' type of brake fluids. That information was misused. I have revised it; now much shorter, and still much too long!
You should, yearly, bleed the brakes more than just the point that fresh new clear fluid comes out.
Best to use a fresh can each time; but, contrary to what is almost universally said ...that recommendation is NOT mandatory NOR NEARLY AS IMPORTANT as many, even some well-recognized 'experts', seem to think. Just don't leave any cap off your 8, 12, or 16 ounce container for an appreciable amount of time. That includes the master cylinder inner boot and cover cap, not just the new brake fluid container cap. Open either only when you need to actually pour some brake fluid. While doing the bleeding process it is best to keep the master cylinder cover lightly in place ....unless actually adding brake fluid to the MC.
The truth is, that if you have a master cylinder cover or a cap of a brake fluid container off for even as long as a number of minutes, even in humid weather, that is NOT A PROBLEM, no matter how much old-wives-tales say otherwise. If you have a rubber bellows inside the master cylinder it is messy to clean during the bleeding process when you remove a cover, to replenish fluid. Just wipe it with a clean lint-free cloth & set it aside during bleeding. Be careful; do not excessively fill the master cylinder. For those with master cylinders on the handlebars, rotate the bars to the left somewhat during the process ....you will do a better job with your bleeding because the angle of the master cylinder reservoir and bottom relief area will be better; and, you will be less likely have spills. For the under tank ATE type master cylinder, replace the cap after refilling to the proper level, then bleed ....etc.
Do not purchase fluid in larger sizes than the above 8, 12, or 16 ounce sizes, unless you do a LOT of brake bleeding at one time, or, nearly so, in which case you might consider the 32 ounce size.
NERDY!!! >>>I have seen something happen a few times over my lifetime, so I offer this warning:
Some cars from Europe, primarily England (UK), used a "hydraulic fluid" in the braking (and/or suspension) system. Hydraulic fluid, which always has special numbers associated with it, such as the Girling fluids, are NOT! the same as DOT3 and DOT4 brake fluids. NEVER use mineral oils or other hydraulic fluids in your BMW Airhead or Classic K bike braking systems. I am aware that brake fluids like DOT3 and DOT4 ARE hydraulic fluids as they are used, but the terminology is 'one of those confusing things'. Mineral hydraulic fluids are used in some braking systems, suspension systems, clutch systems, and in agricultural machinery, and other areas. Hydraulic fluids specified and used for such things are totally not compatible with your BMW braking system rubber parts. Some petroleum 'oils' are used in SOME types of braking systems. They generally do NOT absorb but a VERY LIMITED amount of moisture; & the protectant additives can not generally be of anything over a tiny %. Rusting, corrosion, & other problems over time is possible. Petroleum brake fluids ("mineral brake fluid oil") were used on cars for brakes & in suspensions. Rolls Royce & Jaguar used them. This 'mineral oil' is absolutely NOT the same as mineral oil one can get at a drugstore. Mineral oil for braking & suspension systems is generally about a 10 weight SAE & specially compounded for brake systems. It is also used in some bicycle hydraulic systems & there are different types of these oils. One of the advantages of using mineral oils is that the manufacturer now has one more variable available to enable the type of lever feel, braking power, & a few other characteristics that a glycol fluid of only one viscosity available would not offer. Industrial equipment seldom uses DOT3/4 or similar glycol fluids ...because they DO attract moisture, and therefore will get contaminated over time ...and cause problems. Industrial equipment is not generally exposed to the intense changes of temperature, and the very high heat, of disc brakes (and lower heating for the old slave cylinder hydraulic DRUM brakes used on automobiles, and some trucks, etc). Earth moving equipment typically uses petroleum-based hydraulic fluids. These mineral oils are generally used in systems that might not ever have the fluid changed, or, if so, perhaps many years before such changes. Mineral oils are BAD for motorcycle or automotive brake systems, unless specifically designed for them.
NEVER EVER!!
use DOT 5 silicone fluid in your BMW braking system ...NEVER! DOT 5 silicone fluid does not "absorb" moisture, but moisture, as invisible vapor, will get into the system, usually from ordinary temperature changes ....so DOT5 allows moisture to eventually condense into droplets in your braking system and thereby can contribute to serious corrosion; and it can, in freezing weather, FREEZE-up the brakes! Brakes get HOT from normal use, the cooling attracts more water vapor ....and ....if the caliper gets hot enough, and IT CAN, the collected water globules will BOIL, and that means water vapor. That vapor will compress ...and you will have NO BRAKES, or minimal braking! In most situations even yearly bleeding will NOT get trapped moisture out of a silicone fluid system. Silicone fluids are also not compatible with some or some years, of the rubber parts in your Airhead's braking system (depending on year of seals manufacture, & if Brembo or ATE). The swelling agents are also different. Due to the swelling agents in brake fluid, if switching fluid, use of brand-new rubber parts is highly advisable, and if the parts are not rated for silicon fluid, do not use them. DOT5 silicone fluid has NO major advantage for Airheads; only marginally for ABS systems. Silicone fluid is thin, and does not "absorb" water vapor like DOT3 and DOT4 and DOT 5.1 does ....so you MIGHT think it better & does not need bleeding, & if it did, would be easier to bleed on an opened system ...but, the truth is that silicone brake fluids allow some water vapor to collect, yes, usually small...... and condense as I have noted...but, also it tends to get millions of COMPRESSIBLE tiny bubbles & it froths, defeating any bleeding idea; &, while silicone brake fluids won't absorb water, water vapor (or think of it as water molecules) does gets inside from various means, forms globules, & corrodes/pits the parts! I already mentioned the water vapor problem with a hot caliper. At elevated temperatures, silicone also gets compressible!.....a BAD thing. Yes, a 'liquid' that compresses. Silicone fluid is also tricky to install in a system, and you must not shake or otherwise hardly disturb the container, lest it form micro bubbles that take a day or three to disappear.Yes, there ARE plenty of reports of folks using silicone brake fluid for years in Airheads, with no problems reported. I have, besides what I have mentioned, long suspected that there are various types of rubber parts in the systems in use over the years. Brembo themselves have always used 'natural rubber' (per Brembo) that is not compatible with silicone fluid. That is how it probably STILL is. I am unsure on ATE calipers. Best not to be a Test Pilot. My advice is to use only the fluid the factory recommended, and it is located in the manual and on the top cover of the master cylinder.
Keep in mind that anyone using silicone brake fluid in the stock BMW brake system is acting as a test pilot. That, and the fact that most of those doing such a conversion will not take the time to determine compatibility of their parts, cleaning, etc. You are on your own if you convert to silicone. You may well have no problems at all, even after many years. I don't want to be the one that recommended you use silicon fluid, and you ended up injured....or worse.
DOT 5 silicone type fluid can be manufactured as "part" silicone; and, same for DOT 5.1 which is supposed to be glycol-based, not silicone. This is just one more reason I recommend never using DOT 5 or DOT 5.1. Another problem, a potentially very serious one with silicone's, is they don't mix with glycol brake fluids. Some have tested this and say I am wrong. I am not a believer.
Once silicone is put into a supposedly clean system, even a supposedly well-cleaned entire system, some stuff WILL USUALLY REMAIN. Mixing can causes GELS to form; this is VERY BAD!
WHY DOT3 or DOT4 fluid? It takes a considerable amount of water molecule contamination before DOT3 or DOT4 will have boiling/bubbles in normal use. Manufacturer's know what they are designing, and give a VERY LARGE safety factor for contamination, before the point where you 'lose your brakes'. DOT3/4 DOES absorb water molecules, which is a PLUS for SOME ways of thinking. Why? ...Compare with systems, such as Harley had at one time with DOT5 which is a silicone fluid. If water molecules get into a non-miscible system, meaning, here, DOT 5 silicone fluid, etc. .....it tends to conglomerate into actual water droplets, lodge itself in crooks & crannies, & then does its damage. In contrast, water molecules in DOT3/4 can be fairly well dispersed, as it IS DISSOLVED!, and can contaminate quite a bit, before any damage is done. There are also none of the other problems that silicone has. Of course, DOT3 and DOT4 have their own problems, mostly it is that they should be bled to the fluid replacement point, once a year. Cost is cheap though.
If you regularly bleed/change fluid until the fluid is nice and clear (and, somewhat more fluid than seems necessary is expelled, to be sure the system fluid is mostly fresh), and don't hang the calipers by the hoses, and never use pinch clamps, and keep the caliper outer seals clean ....then you are UNlikely to have to replace/repair the master cylinder or calipers or change brake hoses ...for decades!
There is a product called by various names, but it is a special grease said to be for use in assembling the caliper rubber parts. Some brake kits come with a tiny tube of the stuff. I suggest you do not use it, it can cause major problems, and was NOT for installing pistons and seals anyway. Use brake fluid as a lubricant for installation. After assembly, if any brake fluid is on the outside, just use water or mild soap and water to wash it away.
The REAR master cylinder repair kit, up to 9/1980, is 34 31 1 237 233; thereafter is 34 21 1 242 791.
For those of you with ATE under tank master cylinders, and want to replace the non-functioning brake fluid reservoir cap (34 31 1 234 469 -NLA) with a conventional "dumb" (ie non-level sensing) cap here's a part #:
ATE brake fluid reservoir cap part # 477611361.
Apparently it's a common European car fitment so check with your local imported car parts store.
This is second-hand....I have not checked into it personally.
The 40 mm ATE swinging caliper repair kit is 34 11 2 301 709 (38 mm is 705). I don't think that kit has the INternal O-ring that is needed if you separate the halves. Reportedly, the EPDM R-ring part 9557K72 from McMaster-Carr fits & works OK. The early ATE calipers were quite different & incorporated a strange looking flat spring & an O-ring, at the pads. These were anti-rattle, & anti-squeal parts. O-ring 34 11 1 233 120; spring 34 11 1 232 513. FOR THE OTHER ATE PARTS BMW sells only the full kits. For individual parts, you can ask around; try Motobins of England, & try https://www.capitalcycle.com/ in the USA. I don't know about http://vintagebrake.com, I have never asked the owner, but he is usually a very knowledgeable guy to ask about things.
The ATE swinging type of caliper has an adjustment, and the pads are tapered. The ATE 'swinging' type of caliper must be properly adjusted to give full contact of the pad surface, otherwise braking can be exceptionally poor.
The Brembo 38 mm caliper repair kit does not include the piston, just the O-rings & cap seal. The kit is 34 21 1 237 234. If the kit you have does not include the small O-ring, & you have an O-ring type caliper; I recommend you do not split the caliper. The proper Brembo O-ring may be difficult to find. I almost never split one due to various problems (including needing resurfacing) with trying to get the calipers to be leak-proof, after re-assembly.
Remember that the rubber parts are very likely NOT compatible with strong cleaning solvents! Use brake fluid, or brake fluid with water added, or even add a bit of detergent and water. Flush well with water. I dislike most 'brake cleaner' pressurized can sprays, except as a FINAL cleaner. I do NOT think Brake Cleaner is strong enough, at least sometimes, for anything else.
The Bleeding process:
There are 5 basic ways, with several variations to each, to bleeding/flushing the brake systems, and bleeding and flushing is not truly the same thing. I suggest you flush the system, yearly, by simply bleeding enough fluid through the system. I suggest you use a dead-blow hammer to tap moderately lightly against various components during the entire process a few times, to dislodge filth and bubbles. SERIOUSLY consider the bleeding/flushing method you will be using....some methods will put/flush dirt and filth in the system into such as the master cylinder (or, abs modulators on those types of bikes), ETC. THINK!!!
I have been careful to set down information and methods, below, that are effective, and safe-enough, when used with thought and care!
Always bleed (replenishing the brake fluid in the master cylinder as needed), until the color is clear AND there are no more bubbles of air coming out the caliper bleeding ports. A full bleeding will mean that even a slight discoloration (often faintly straw or very light brown) has changed to the water clear color of fresh fluid ...AND! ...you bleed considerably more than this point, to thoroughly get moisture contaminated fluid out of your braking system.
Discolored tubing at the bleeder port(s) can influence what you are looking at. Besides that, slightly deteriorated brake fluid may still be clear, or nearly so, so you might then have to estimate the amount of bleeding to do. It is easier to see the fluid color if you use clear plastic tubing when bleeding. I suggest you bleed until the fluid is fully clear AND rather considerably more.
START the process at the master cylinder. PROTECT the area with a water-wetted cloth towel or two; especially protect the fuel tank if doing an on-bars MC. Brake fluid eats paint, NEAR INSTANTLY! Remove the MC cover, don't let it drip over things; I put it, and any rubber bellows, on a clean cloth, setting it aside nearby, and NOT where I might accidentally bump or kick it!
The MC has a tiny bleed-back hole at the very bottom in a depression, usually very easy to see with the cover off. That tiny hole supplies the system with fluid, and allows fluid to come back when the lever is released. The hole MUST BE CLEAR.
Syringe most out all of the fluid, except DO leave enough to cover the bleed-back depressed area at the bottom. DO NOT operate the brake lever AT ALL with such a low level of fluid. A rubber baby syringe from the nearest drug store is perfect for this ...BUT, be VERY careful to not allow it to squirt all over the place as you remove the syringe from the reservoir.
After syringing out all but that small amount of brake fluid, clean up any blackish residues often found in the depressed area using 'Q-tips' or other lint-less method. Then ADD fresh fluid to about 1/2 to 2/3 of the internal capacity of the reservoir's height. You will need approximately TWO to THREE such fresh master cylinder fluid amounts to do the average bleeding/flushing. Do whatever bleeding method you prefer (I will make suggestions herein), & as the fluid gets quite near the bottom of the master cylinder, replenish it. DO NOT allow the master cylinder to run out of fluid!! .....doing that will cause you LOTS OF GRIEF, because you will pump air into the system!
It is best to put the cover back onto the MC between bleedings, but you need not tighten the cover. Eventually you will be cleaning the top area and do the final installation of the cover and any bellows, and then it is important to NOT over-tighten the cover ....especially if it uses screws! ...the covers can warp, & then leak ....or you can strip out the screws. Light/medium screw pressure is all that is needed, because of the rubber seal.
DO NOT push the pistons back into the calipers before beginning bleeding operations! ...that can stir up sludge. SOME professionals, in my opinion, WRONGLY do this. They do it because changing the fluid/bleeding is faster, less fluid is often used, & they may think that doing it that way makes for a more thorough fluid change. NOT TRUE! If the pads are fairly well-worn, and you push on the pistons, the pistons will go inwards quite a bit & then any piston corrosion, etc., will rub on the very critical square O-ring seal, damaging it. Crud/deposits, corrosion, etc., could be present at the place the master cylinder piston AND the caliper piston have been stopping at. If you push the caliper pistons inwards & then start bleeding, you will usually move the brake pedal or hand lever much further than it had been moving previously. That can cause the MC piston seal to be damaged, & the MC could need $$ overhaul or $$$$ replacement.
Another problem can occur if the MC cover is off, you might cause a squirting upwards of brake fluid as the caliper piston is pushed back. If replacing pads, pushing the pistons back into the caliper "SOME" WILL be necessary. OPEN THE CALIPER BLEEDER A BIT & let fluid flow out via a clear plastic hose into a container when pushing the pistons back SOME. This is MUCH better than allowing dirty contaminated fluid to be pushed-back into the reservoir. Push back ONLY enough to enable the pads to be changed!
REPEATING A CAUTION: Brake fluids EAT paint. Have wet towels/shop-rags not just handy, but already placed below the master cylinder, covering any painted parts such as your fuel tank!!! ....etc.
NEVER bleed the calipers unless they are on the discs; or, you have placed a spacer, simulating the disc thickness closely, into the caliper.
The Airheads REAR DISC caliper MUST be unfastened; its bleeder port VERTICAL, to adequately bleed the rear brake. In a few rare instances, it is difficult, even then, to bleed the REAR caliper. Try LOWERING the caliper as far as you can, with bleeder port still vertical. DO NOT sharply bend the hose!
The front brakes are NOT OVERLY critical about the port position, but I highly recommend vertical or near vertical. If you are changing hoses, or rebuilding the system or any part of it you MUST do bleeding with the port VERTICAL.
With systems having only ONE hose, and a crossover line with dual discs, bleed the furthest caliper in the system first.
HINTS:
Do NOT leave the master cylinder at NOR ABOVE the maximum fill line after you are all done. It is better to have the level lower than the maximum line; INCLUDING when the bellows is installed and cover is on. If the rubber bellows has deteriorated, replace it. Do NOT over-tighten the rectangular top cover on the handlebars type master cylinder ....there is an updated (rectangular models) cover available ....early rectangular ones would warp. When the improved Airhead rectangular cap/cover is used, a gasket (I do NOT mean the rubber bellows) under it was eliminated. My old hand-scribbled notes said that the updated cover was 32 72 1 454 945.
The handlebar master cylinder is on the right side and I find it best to rotate the bars somewhat to the left when doing the bleeding ....the idea is to move the MC to a higher ... and better angular ... position. This definitely helps air bubbles return to the MC, as well as allowing better syringing, less spilling likely, etc.
Have the bleeder hose go from the vertical caliper bleeder valve UPwards several inches, before it goes downwards into the catch bottle. This helps prevent sucking-back air as soon as any fluid is above the bleeder valve....AND ALLOWS EASY VIEWING OF ANY TINY BUBBLES IN THE FLUID COMING OUT DURING BLEEDING.
Many calipers I see have 'sloppy' (worn) fitting bleeder valves. WRAP, fairly tightly, the cleaned threads with a layer or two of common thin Teflon plumber's tape. This usually will eliminate the sucking-in of air during bleeding, eliminate leaking, and eliminate having to over-tighten the bleeder.
I usually put a thin block of wood at the handlebars lever or rest stop point, to prevent the lever from moving all the way back. Not needed on a brand-new MC. If you do bleeding relatively often, and you have done this since the MC was new, you do not need such a mechanical stop. You are always 'taking a chance' when using full-possible lever movements without such a restrictor block on previously in-service master cylinders. Any wood block you use should be just thick enough to prevent the lever from coming back further than it should, & that amount is something you will have to estimate. I use rubber bands to hold the wood block to the throttle. In fact, I have a piece of wood, with one side concave, to fit the throttle ....it tends to stay in place better. There are instances this sort of hint won't work, but if your system had a reasonably hard lever to begin with, it is a good idea, as it prevents you from moving the piston in the MC back into any dirt/crud/encrusted area.
COMMON bleeding on a system that is already in use and functioning is usually started this way:
Pull the lever back, relatively hard, see where it has been going to, how it feels. Don't, if it goes all the way to the stop, which it will if there is a fair amount of air in the system, or is in process of being refilled from having a part replaced, unless that part is the MC. You never want to pull a lever all the way back to the handlebar limits, unless the MC is brand-new or newly sleeved. Most end up doing that, most don't have problems. SOME do as the MC piston moves over corroded areas it was not going to before. Remove your hand from the lever. Install a limiting block if you wish.
Set up the bleeder hose; catch container; proper wrench at the ready (usually 7/16"); a wet large rag (nearby and maybe one already on the fuel tank and one under the MC if on the bars). Have the bars rotated somewhat to the left (bars type MC). Remove the MC top and any bellows, setting them aside in a clean area. I use a rubber/plastic ear syringe or whatever, to nearly completely empty the master cylinder of old fluid, before beginning. As previously noted, I suggest you leave a bit of fluid in the bottom depressed fluid area. DO NOT operate the lever with such low fluid in the MC. Use a Q-tip to clean out any black residues. Add fresh fluid to about 2/3 level, then begin the bleeding.
Bleeding/changing fluid on brakes could be an entire article in itself; in fact, it is a long even here. Here, following, is a method that works fine ASSUMING that you already have at least a mild to moderately bled system, which means that the hand lever will get stiffer feeling as you pull it backwards.
Slip the box-end of a 7/16" short wrench over a clear piece of plastic tubing that fits SNUGLY to the caliper bleed port valve (old hardened plastic tubing is NOT a good idea, if just the end of your tubing is hardened, cut off a piece). Have the tubing go UPward into a loop, then downward to a catch bottle. It is a good idea to have the catch bottle supported in some way so you do not accidentally kick it! Be sure the master cylinder, mostly syringed out & cleaned of black residues, is now 1/2 to 2/3 full. For bikes with the MC on the right bar end area, move the bars to the left some; you want the MC to be high and more square to the floor. I usually have the bike on the center-stand. For under-tank master cylinders (ATE), the bike should always be on the center-stand. Be sure you have the area below the master cylinder covered by a quite damp water-wetted rag, and more water and rags standing by. This is particularly important for the on-bars master cylinder. You do NOT want, ever, the slightest amount of brake fluid to get on your paint ...and the painted fuel tank is right there! (unless you removed it). Do NOT take chances. You could accidentally bump the front end, ETC. I cover customers fuel tanks & any area of exposed paint, with wet cotton towels.
Squeeze the lever ...and while KEEPING some pressure, ....loosen the bleed port JUST enough so that the lever begins to and does move to maybe 2/3 of the way to the stop; or, if using a blocking device, pull the lever backwards until it almost stops. Before the lever moves all the way, tighten the bleed port lightly. It is best to do it this way because releasing the lever with the port open (or, rarely, lever stopped in movement) can SUCK IN air from the outside, something you do NOT want. This is a two-handed operation if you do it by yourself. NOTE that this SAME method is used to bleed the rear disc brake on such as the S, RS, and RT models. However, those usually require a helper to push the pedal per your instructions, each time. Note also, that the first bleed, or second, is required to fill the plastic tubing that goes upwards some, to an inch or more of fluid, so be careful to close the bleeder port valve early, because releasing the lever will try to suck-in the old fluid, or if not enough, AIR! This is another reason to use Teflon tape on the bleeder threads ...you do NOT want any possibility of sucking in air as the lever is released! Once the fluid level is an inch or so above the bleeder, there is less chance of sucking-back, but be cautious.
Release the lever & DO wait a FEW seconds. Waiting is important to allow fluid to return to the master cylinder. Repeat the process over & over until the exiting fluid is clear & no bubbles of ANY size appear in the clear plastic tubing, and a fair amount of fluid is used from the master cylinder. Be VERY careful NOT to run out of fluid in the MC!! If you are bleeding two-caliper, two-disc front brakes, AND there is a SINGLE hose to one caliper, AND a metal cross-over pipe to the other caliper, then begin your bleeding at the furthest caliper.
A system is usually bled & fully-flushed by using up several liquid ounces of brake fluid ....which is MORE than just the initial amount of fluid in the MC, so you must replenish the fluid. Don't run out of fluid in the MC!!! WARNING!! Replenish the master cylinder BEFORE it gets empty!!! ...failure to do this can cause you enormous bleeding problems as you suck & force air into the system!! You do NOT need the rubber bellows, if you have one in the master cylinder, during bleeding; but having the cover on is a good idea & there is no need to hardly tighten the screws ...just barely in place lightly is adequate ....enough to prevent spills if the bars or bike is accidentally jarred.
When you are done, and the MC filled to BELOW the max fill line, cover tightened moderately, any bellows installed first, then clean the MC area with a wet rag. Remove the bleeding hose carefully. Have a wet rag already in place there to catch the fluid, do NOT let it get onto the brake pads, wheel or fender paint work, etc.
If you are the diligent sort, who regularly bleeds the system fully, which means a fluid CHANGE, as I have described, then it may be OK to use full lever movement. It is always OK with a new master cylinder.
If you have opened the system, meaning removed a hose or fitting or worked on the internals of a caliper or master cylinder (NOT meaning just removing top cover from master cylinder), then the bleeding process "can" take a long time, and be a real nasty chore occasionally. In some instances a bubble of air can get trapped at some junction, & cause you to be VERY unhappy trying to dislodge it. Pressure & vacuum methods are available. In some instances, with the UNDER-tank master cylinder, you may have to move it (probably tilt it) to eliminate such a bubble of air. Tapping on fittings can be helpful in releasing a bubble. For the Airheads with one hose & a cross-over pipe at the twin front discs, it is often necessary to unfasten and move the system in such a way that the bleeder ports are dead-vertical. On the Airheads with a rear disc brake, rotating the caliper for the bleed port vertical is a must if the system is quite spongy & you have not been able to bleed it otherwise. I always do the bleeding with the bleeder port vertical on the rear brake, because you can't do a thorough bleeding if the bleed port is not vertical. If having problems, LOWER the caliper as much as possible. I recommend that even if the foot lever feels OK, that you ALWAYS do all rear brake bleeding with the bleeder port vertical. To rotate the REAR bleeder port vertical, without removing the caliper (and avoid the need to insert some sort of 4 or 5 mm object between the pistons), you need to unfasten the holder's bolts. I usually remove the rear caliper from the disc, as the hose is not overly long, & insert a 4 or 5 mm object anyway, avoiding problems.
Do NOT forget that if the caliper is NOT over the disc, you must insert a spacer into the caliper gap, otherwise the pistons will be pushed to the caliper center ...A BAD THING to have happen. The spacer should fit well, as you do not want the caliper pistons moving much at all when you are bleeding, to avoid possible dirty/corroded places on the pistons, which will wear the square O-ring that does the fluid sealing. That is why the disc is better for a spacer.
Remember, bleeding removes old fluid, & you want as much of the old fluid removed & replaced as you reasonably can. This takes more bleeding than you might expect, as the fluid must mix, particularly in corner areas, to then be pushed out by the bleeding process.
Bleeding problems apply to front caliper(s) if the bleeder port not vertical. This is especially so with rebuilds. On any braking system, if any part is being replaced where the brake fluid parts have been opened, replaced, or removed, be very patient and go about the installation and bleeding in an orderly manner, and do not refill quickly ...allow time for bubbles to rise.
Some BMW airheads with twin front discs have ONE brake line leading to one caliper, and a crossover line to the other caliper. If that is what you have, bleed the most distant caliper in the system FIRST. That is a good policy for ANY brake system ...bleed the farthest distant caliper first.
General Rule: Under the best conditions it takes not quite 2/3 of a MC reservoir of brake fluid to bleed EACH caliper to reasonably clean fresh fluid, typically the number and size of caliper pistons make little difference. Do NOT make the mistake of just using a couple of bleed cycles, and think that the fluid is replaced. Just because the lever feels good, solid & hard when pulled (or brake pedal pushed) (with bleed port closed) does NOT mean anything other than bleeding has been done to remove the bubbles. In some systems, THREE master-cylinders of fluid will be required for a good flush.
HINTS: If you are changing a hose or caliper or master cylinder ...or; otherwise, 'opening' the system, you may have lots of problems trying to bleed the system properly. Even if you are NOT opening the system, the following information may be of considerable value:
Vacuum bleeding at the bleeder port may or may not work initially. There can be PROBLEMS using vacuum devices, such as the popular MityVac, a whole story unto themselves. OFTEN you will see bleeding constantly emitting bubbles, when they are actually coming from OUTside, leaking into the bleeding fitting where the bleed tubing pushes on or at poor threads at the valve (use Teflon tape on threads). You may need to know tricks & hints when using a MityVac or similar device, whether pressure or vacuum bleeding method is being used. Filling the hose, or any part upwards, as best possible, from the caliper bleed port, using a syringe/needle and clear tubing setup, and adding fluid quite slowly, will help (on systems that were taken apart), as will tapping on every part to release bubbles, and letting the system sit overnight to allow microscopic bubbles to rise (those two ideas for any system, taken apart or not). OFTEN you must have things vertical. You may have to dislodge a hidden bubble located at such as the brake switch, especially on ATE MC under the tank. Remember: You are NOT a shop charging $$$ per hour for this. You can afford to take your time, and try different things.
FIRST: Try normal bleeding, without vacuum or pressure equipment. If doing the front brakes on a bike with the bars-mounted master cylinder, turn the fork to near but not quite full LEFT, so the master cylinder is the highest thing in the system ...that sometimes dislodges bubbles overnight ....they rise to the reservoir. Lots more later, below.
Use the lever a number of times with the forks constantly to the left, then let the bike sit overnight. Use a plastic handle on some tool, or a tiny hammer, to tap JUNCTIONS of hose/fittings/lines. Do that before the overnight resting period & again during it, a few hours later. If these things do not work, then I recommend TYING the lever back, letting the system again sit overnight. I use a block of wood shaped properly, to prevent the lever from coming full back (unless the master cylinder is new or newly rebuilt, then no block needed). That might not let the bubbles come back into the master cylinder, but it pressurizes the system a wee bit (depending on situation), & then bubbles will hopefully rise & be easier for them to get into the reservoir, when the lever is released. If doing the overnight thing, release the lever in the morning, and then leave the lever alone! ...for a few hours, or overnight. For ANY bleeding work, the tiny return hole in the bottom of the master cylinder MUST NOT BE CLOGGED.
If this does not work, the next thing is short sharp jabs at the lever, & tapping (I use a small hammer with a plastic head, but a plastic screwdriver handle also works well) at the area of hose connections, at MC outlet, etc. ...then again let the bike sit overnight (don't tie the lever this time). Tiny bubbles rise over time & will rise to the highest level ..but....they can be trapped by sharp turns, etc. If there is a substantial air bubble at a very high point, then when you use the lever, the fluid may flow UNDERNEATH the bubble! This is why the short jab may well dislodge the bubble & cause it to return to the MC, or, be expelled at the bleeder in some instances. If you are having these sorts of problems, and are frustrated, keep in mind that you WILL solve the problem, and the problem PROBABLY came about because the system was opened. I can't tell you how many times I have seen or heard from frustrated owners (and the occasional technician!) when, in particular, stainless steel braided lines were installed. Be patient!
Air bubbles in a braking system, & they need not be big ones, will cause a soft spongy brake lever feel ....and if severe, you may have egregious problems trying to get ANY brake pressure ....to the point that the brake lever will never seem to start showing a stiffening. It is THIS problem that tends to drive folks crazy. Systems that were opened-up, for parts replacement or repairs, commonly to install new brake hoses (SS or not) OFTEN have problems. The method of filling, bleeding, etc., in a SHOP situation is OFTEN different from in a home situation. Shops may have pressure bleeding equipment (usually, not always, more effective than vacuum bleeding methods), & may have top down master cylinder caps pressure equipment. Even shops have problems with bleeding brakes that have had the system opened. I give practical advice in this article, that usually does not require special equipment.
If you have a Classic K-bike (K1, K75, K100, K1100) with ABS, you can bleed conventionally, and I suggest you do the modulators first. I prefer doing them first ....it usually results in a quicker job, less fluid needed, etc.
It is not uncommon to have someone, with a UNDER TANK ATE type master cylinder, bleed & bleed with no results, the lever does not stiffen up. The piston gap was set correctly, and that did not help. You try overnight waiting, you try vacuum methods, pressure methods ...and still no lever pressure. Your cussing vocabulary is expanding. The problem is very likely a bubble of air in/at the SWITCH at the master cylinder. You may have to move the master cylinder position in order to get out the last of the bubbles. You will want to remove the switch, fill its cavity & reassemble in such a way that you try not to introduce a bubble. Tilting often works!
Various forms of pressure and vacuum bleeding are in wide use. Even the old drip-method (which I do not talk about) is in wide use. THINK before using any method besides the push pedal (or pull lever), including overnight waits, etc. REVERSE pressure methods, using a tool that applies fluid under slight pressure to the caliper bleeder valve, may help in egregious bleeding cases, but may force dirt/sludge upwards into the system. The supposed advantage is that bubbles tend to rise. I prefer NOT to use pressure bleeding AT THE CALIPER. Special methods are almost never needed if the system can be pressured (actuate the lever or rear pedal to find out) normally. If the use of the lever or pedal does actuate the brakes, then all bleeding can be done normally. I have talked to quite a few owners who have had problems during bleeding. Many times the problem is something very simple and easy to fix by simply changing technique.
My own shop usually tried simple manual bleeding first. If no luck, we USUALLY used a modified master cylinder top, which we used with a very small amount of air pressure from a hand syringe. We seldom used vacuum methods, and almost never pressurized at the caliper port. We did use the rubber/wood blocks and rubber bands overnight methods now and then.
When a braking system is 'opened', and by that we mean such as a caliper overhaul, master cylinder overhaul, or installing a new hose, etc... THEN slightly pressurizing the MC may work very well. Once a very small pressure is in the master cylinder, you simply open and close the caliper bleeder port. This is done by using a modified MC top (with, perhaps, a MityVac) (if you ever replace a MC, KEEP the old top!), can work well, & much better in MANY respects than pressuring at the caliper bleeder, with fewer contamination problems, & it actually tends to force crud out of the system at the caliper bleeder.
Shops are always throwing away master cylinders ....including the covers! Ask your favorite shop if you can have an old master cylinder or two for the tops. Take the whole MC if you can, and find out, by disassembly, exactly how it all fits together and how it works!
Vacuum bleeding methods often cause more headaches than fixes. There is a tendency for the tools to leak at the bleeder screws, even with teflon tape on the threads, & you could see constant bubbles of air in the bleeder hose/tubing, when in actuality those bubbles are from the outside, & NOT from inside the system.
Disc Brake System Problems and General Notes:
Disc brake systems can have a number of problems. I am going to list some common problems, symptoms, reasons, etc.
If any condition causes the fluid to not return, or too slowly, from the caliper to the master cylinder (after the lever or brake pedal is released), the pads may remain in excessive contact with the disc, causing excessive friction, & possible overheating of brake fluid, pad, disc, & caliper. It could even lead to freezing-up or locking-up of the brakes. This can happen suddenly. Besides deteriorated parts from failure to bleed regularly, the most common reasons for these things is a kinked inner tubing inside the brake hose, often caused from hanging the caliper by the hose instead of a bungee (or, rarely, a VERY old & deteriorated brake hose) .....and/or, a plugged fluid return hole, which is quite small and is located inside the master cylinder at the bottom, usually in that little depression place. Contrary to old-wives tales, the BMW rubber brake hoses, unmolested, can EASILY last for 20++ years, and 100K-200K+ miles. MANY have gone MUCH longer and further!
The ATE swinging type of caliper has an adjustment, and the pads are tapered. The ATE 'swinging' type of caliper must be properly adjusted to give full contact of the pad surface, otherwise braking can be exceptionally poor. The piston of the master cylinder must also be properly adjusted.
Relatively common is corrosion of some sort on the pad pins or the retaining spring ...these parts should be cleaned & a tiny bit of moly grease or antiseize compound used on the pins. I like to remove the pins for this (PULL them STRAIGHT OUT!), & put them lightly against my rotating wire wheel which cleans and burnishes them smooth. I then use a FAINT amount of moly grease or even a dry moly product, or even antiseize compound. Brembo used to supply a tiny tube of silicone grease for this. Failure to faintly lubricate the pins can result in SQUEALING, and in some instances, the pads do not move squarely and smoothly.
Even the dust shield around the piston could be causing a problem, so check carefully.
Pulsing in the hand or foot levers is often caused by warped discs or hard/soft places in/on the discs. It can also be caused by irregular glazed deposits, which are usually totally invisible.
Bent discs or warped discs have few direct causes, but one in particular is caused by placing the wheel on the ground or floor when changing a tire/tube. The disc must never be allowed to be pressured in this manner. Discs, and the dished mounting plate they attach to (disc carrier), do get warped from such and other abuse. This causes lever pulsation. This is often easy to see or measure on the bike. You often do NOT need a dial-indicator to see it, just a pencil tip near the disc as you rotate the wheel very slowly.HINT: If you are overhauling caliper internals, you may find that cleaning/scraping old corroded caliper bore grooves can be done by some sort of modified screwdriver blade, or one can do it a bit easier by heating the bore with a small gas torch ....to hot, not fiery! Once cooled, the residue will be much easier to clean out. I use a cut-down brass brush sometimes. NEVER EVER have wet brake cleaner in the caliper when heating with a torch.
DISC GROOVES, THICKNESS & WEAR:
Discs get grooved & this can sometimes cause problems. Usually the grooves look bad, but are or can be MILD, and new pads CAN be broken in to such a disc if they are not used too vigorously for awhile. I am well-aware that is controversial ....especially if you are in the business of SELLING new discs!
It only takes a tiny bit of dirt, grain of sand, etc., to get into the lining or on the disc to start a groove type wear on the disc (pad too of course). This MAY NOT BE a big problem, OFTEN NO PROBLEM ....which is contrary to what folks trying to sell you discs may state. Certainly, discs with grooves are going to take time to have new pads break-in to them ....and in some instances the discs do look as if they need resurfacing ....but that is tricky, and would need to be done on a surface grinder; could be rather expensive; certainly takes material off the disc, & there is a factory limit to the disc thinness, stamped right on the assemblies. Because of this, & the thin discs used on motorcycles to save weight & improve handling, I recommend you NOT resurface your discs. If you DO resurface: ...the very best method of resurfacing a disc ...perhaps to eliminate some PULSING in the lever (disc warping is not often fixed by resurfacing)....is to go to a QUALIFIED machine shop that has what is called a "Blanchard Grinder"....and remove a few thousandths from each side of the disc. I have one or more companies listed in my https://bmwmotorcycletech.info/references.htm article that will resurface brakes by the grinding method. Look for the name of the companies in the B section of that article. You may want to consider http://www.Truedisk.net in Michigan, who can refinish/resurface motorcycle discs, by grinding.
Grinding sometimes does not work well if the disc metal has taken on a 'memory' in the material itself. If you have a warped disc and/or carrier, I suggest you NOT grind the disc, but try to anti-warp; OR, use very thin shims at the carrier bolts, which may well remove enough of the warping. This does not work well ...usually (with exceptions) on floating discs. Replacement may be your only choice.
Discs that look poor can be fine. A bigger problem (?) might be if the discs are worn to considerably thinner than the minimum BMW says is allowable. You are not supposed to use discs when they are below limits, usually stamped into the disc or carrier. ALL legal disclaimers here! The safest thing is to follow stamped limits, or book limits. I am not going to be liable for any problems if you do otherwise ...but, IMO, discs can often be used considerably thinner than specifications. JUST HOW MUCH THINNER is YOUR value judgment. If the disc is very considerably too thin, there is the possibility that the piston(s) could come OUT of the caliper, or, angularly cant ...and cause serious problems. If thin, the disc will overheat more easily. The disc could even crack or otherwise have a serious problem. The specifications on the discs, IMO, are overly conservative. It is my belief that the thickness specifications are set first for heat accommodation ability ....thus, those that are not quite hard on their brakes may, no guarantees here!, continue to use the discs to quite a bit below minimum thickness specifications. OK, my disclaimer is now dealt with. Like all manufacturer's, BMW discs have an official wear limit. The limit varies with the model. Limits are often stamped into the disc brake carrier, something like: min 0.18. The limit marking is usually on the INside surface of the CARRIER, near the outer edge. You sometimes have to look closely for it. Sometimes markings are on the disc.
Both discs and drums have wear limits.
For most of you, with warped discs, & thickness life left, you could try, at your own risk, shimming the carrier, or truing on a lathe, indexing off the disc. Replacement with a new disc/carrier may be required. Shimming is done with very thin pieces of metal or paper at one or more mounting bolts areas. A very thin shim at a carrier bolt has a large effect. I have used old pieces of feeler gauges, brass shim stock, paper, etc. In some circumstances the situation is fixable by putting VERY THIN shims under one or two of the areas next to or at where a carrier bolt goes through. This generally takes little time to do. I sometimes use very thin brass sheeting for this, typically .002" thick, but can be thinner, or slightly thicker. Paper also works well. I have used pieces of old very thin feeler gauge material which are steel. A very thin shim makes a big difference at the O.D. of the disc. A 0.001" or 0.002" shim makes a considerable change. I know some who have used a press to fix most of any warpage. Again, you are on your own. I've done some of these things.
Pulsing can come about from invisible coatings from the pads, spot-glazing, hardened areas, etc. ...& you should clean the pads and discs with 500 grit sandpaper, and clean the disc and the disc holes too, then see if the pulsing is gone. Sometimes sandpapering the disc fixes all or part of the pulsing.
You should meticulously clean the disc holes once in awhile, and I personally clean the disc surface often with a CLEAN rag and a strong evaporating solvent ...usually after each washing. NEVER replace pads without cleaning the holes and sandpapering the disc with fine grit paper (and then cleaning!). Clean the holes, then clean the disc, then clean the holes, then clean the disc. When all is finally cleaned, wash.You are on your own if you exceed BMW guidelines for disc thickness or drum diameter, etc.
General and miscl:
There is a peculiarity with Airhead models which have a master cylinder under the fuel tank (ATE "swinging" brakes). These may incorporate a float switch, whose purpose is to illuminate a brake failure light if the fluid runs low. The lamp gets tested each time you start the bike, using a circuit that contains a diode. If the diode shorts, & you are also low on fluid (which activates the switch), the starter could theoretically energize! This is exceedingly RARE. The anode of the diode connects to the brake switch & the cathode of the diode connects to terminal 85 on the board & also to the starter relay coil. The 1977 bikes do not have the diode in the brake warning lamp circuit.
BMW's production year is not from January 1st to Dec 31st, because the factory shuts down in August for the annual vacation, & all bikes manufactured afterwards are supposedly the following calendar year bikes. This was nearly universally true for the Airheads, with a few AIRHEAD and K bike peculiarities over the years. There are some other anomalies, some I have never written about. I have an article that gets reasonably deep into the years and numbers, and lots more: https://bmwmotorcycletech.info/IDnumbrs.htm
Drilled or slotted discs: These are not drilled or slotted primarily for sweeping off rain water and/or cooling, as is commonly thought. The real purpose is to reduce the gas effect that is produced from the resin binders in older (especially) pads as they heat from braking effort. The gas goes to the pad surface, and thereby makes a 'hydroplaning' type of layer that is exceedingly thin. This happens to some extent with ALL disc pads. There are two other purposes for drilled or slotted discs. Drilled discs help INcrease the coefficient of friction. The holes edges promote 'bite'. The latest high friction pads minimize that improved effect somewhat. The other purpose of drilling (or slots or even shallow grooves) is to help remove brake disc debris. Holes and slots have NOTHING MUCH TO DO WITH COOLING. The gas effect was extensively studied by the brake makers, and that is one major reason that some newer calipers have TWO sizes of pistons ....do YOU want to think, here, about WHY that is so?
Many, especially the front, automobile discs are very differently constructed, and cooling is had with their type of VENTILATED (ON EDGE) design. They are vastl thicker and heavier than bike discs, most are made as if they were a double disc with cooling between them, and thus would not be appropriate for bikes, as the handling would be adversely seriously affected by the weight and inertia.
Motorcycle discs tend to collect oil, pad deposits, grunge, etc., and need to be washed with detergent/water mixture now and then, and Q-tips should be used on the holes and slots. I clean FIRST with a decent solvent. Failure to clean the disc slots/holes can cause RE-contamination of brand new pads!
When I have a 'problem' CALIPER to clean, and solvent and soap/detergent/water and brushes don't work well, I then use a propane torch on the deposits. Afterwards I mechanically clean the caliper with stiff brass bristle brushes, ETC. I am very careful. If you are nervous about using a propane/MAPP torch, do not use one. Try to get every remnant of mineral & other deposits out of the caliper ...especially the area of the square O-ring. The piston MUST be in truly good condition. Corrosion and pitting is NOT ALLOWABLE! I like to polish them. I believe the result is much longer lasting seals. Keep in mind that calipers that are bolted together, not taken apart, might have hidden rubber parts for use as a seal between the halves. Excessive heat could be damaging. I highly recommend you do NOT take caliper halves apart, unless absolutely necessary.
Split caliper halves ONLY when really needed! In some instances, you can NOT remove the piston fully without splitting the caliper. If you are overhauling Brembo calipers, if the kit does not come with the 10 x 6 x 2 O-ring, do not separate the halves, unless you get the proper EPDM O-rings ahead of time. When you try to reassemble the parts, small distortions from tightening the bolts (new ones in the kit) will sometimes let the calipers leak. I first resurface the caliper halves by using very fine grit sandpaper, upside down on a very flat hard surface, using equal pressure & figure eight's, and changing hand positions often on the part. This all takes time & labor. I HIGHLY recommend you do NOT separate halves unless you MUST. Be sure the O-ring area is clean. If things are poor, you best purchase a brand-new caliper, unless you KNOW what you are doing, or can follow directions exactly!
AVOID using strong solvent cleaners ....they are almost always NOT safe with the various rubber parts. Common carburetor/choke cleaners, and other strong sprays, are absolutely not to be used around brake system rubber parts!
When I rebuild a brake caliper I use liquid dish detergent and water, sometimes with small brass brushes, all followed by flushing well with water, then either baking for an hour in my oven (around 200 degrees Fahrenheit) or letting them dry for a day or three.
WARNING!! If you use brake cleaner, never, EVER, heat Brake Cleaner; that includes spraying quite hot parts!! High heat can create a seriously poisonous substance called PHOSGENE. Phosgene is produced when chlorinated hydrocarbons are excessively heated.
WARNING! NEVER ...EVER! ...use a pliers, or any other tool, including a clamp, to squeeze a brake hose or other hydraulic system hose. This has been done by some, including professionals who are lacking in true knowledge, to stop fluid from leaking when replacing calipers and other items. DO NOT DO THIS! IT LIKELY WILL SERIOUSLY DAMAGE the small thin plastic tubing located inside the hose, and the damage MIGHT NOT SHOW UP FOR A LONG TIME.
WARNING! NEVER, EVER! put pressure on brake discs when changing tires or doing other wheel work! Support the wheel with, perhaps, pieces of 2 x 4 lumber under the tire/rim. Keep the disc(s) OFF the ground! If you do not heed this warning, you MAY warp the disc/carrier. Some folks have old oil drums, one end cut out, set vertically, for use as a fixture when working on wheels.
Frozen or jammed pistons; high pad friction with brakes not in use; retraction problems, etc:
You might find your brake caliper pistons jammed; or, partially so. More subtle, & seen more often, is to have them not retract as well as they should, which lets the pads stay in contact with the discs with too much pressure when they should hardly, just barely if anything, be touching. There are multiple possible causes. One is the O-ring (yes, it is square in cross-section) that is around the piston and seals the fluid from escaping. That O-ring, by deformation (it is designed to do that), is what is supposed to help retract the pistons ever so slightly, once you release the brake lever pressure. These square O-rings have been known to get hard with age ....but it is the corrosion in their associated caliper groove & perhaps a corroded piston that are typically the main problem. Water molecules are always collecting in the brake fluid. The fluid has anti-corrosives to deal with this, up to a point where the water is at a high enough percentage to cause corrosion. From that point onwards, the O-ring and piston will start having problems.
Another possible problem is accumulated carbon & rubber residue, corrosion contaminants, etc. These can plug up the small return hole in the master cylinder, thus the caliper part of the system will retain pressure, and the pistons will not retract fully or enough. When you release the lever, the high pressure in the system decreases to nearly nothing almost instantly, and any return of brake fluid to the master cylinder is VERY SMALL IN AMOUNT. Since the pressure is so low now (after a few drops of high pressure, it is the square sectioned O-ring deformation that returns any more fluid, and that pressure is VERY low!), any slight obstruction acts as a goodly block. Thus, the pads can remain in contact with the disc, sometimes strongly, creating heat as you ride, due to not releasing more fully.
Still another problem is a faulty hose, from kinking of the tiny diameter plastic tube inside the hoses. That can create a one-way valve because of the huge pressure differential between squeezing the handle and releasing it. That kink often comes from folks hanging the calipers by their own weight, instead of by a piece of baling wire or a bungee during wheel removal, for such as bearings service or new tires ....and sometimes from very wrongly using clamps to stop fluid flow.
There is yet another problem with jammed brakes seen now and then ...the wheel won't rotate easily, and the pads are in strong contact with the disc. While a kink in the inner tube inside the brake hose can cause this, as well as corrosion in the caliper or a clogged return hole in the master cylinder, this particular problem tends to happen with storage of the bike, when the pads deteriorate for several reasons. In this instance, the pads have frozen to the discs, and the wheel won't turn, or hardly (& you have not been out riding). Remove the pads, clean discs, replace pads with new ones. You can try reusing the pads after cleaning them, and you might consider SQUARELY sanding the friction side SLIGHTLY, on a flat surface.
To try to identify what a sticking pad problem is, put a water-soaked rag at the caliper area to protect the paint and pads; slightly open the caliper bleeder bolt (best if it is vertical). If fluid flows out with the port vertical and the caliper pads become UN-stuck, sometimes you have to try to rotate the wheel forwards and backwards, then you have a fluid blockage problem ....usually the hose or MC bleed-back hole is the problem.
Numbered section:
1A. DRUM rear brakes; shaft O-rings ...etc.: There is, generally after 1980, one or more rubber O-rings on the REAR brake actuating shaft, in the SQUARE grooves in that shaft. That shaft may have up to 7 grooves machined into it. Do NOT put any O-rings into the round cut grooves.
Prior to 1980, most did not have any O-rings, you simply cleaned the shaft, greased it, and there was a felt just left of the right side actuating lever, at the outside spline end. I like to use silicone grease here, on the shaft (and O-rings if has them). 1981-1984 (to 3/1983?) models used 4 O-rings, in the square cut grooves. The early tube that the brake cam passes through was different than the later ones. The early one fit into the cover, and leaks were possible. In 1985 (may be an error, could be 3/1983) BMW changed to a full-length tube through the rear drive, & the shaft is inside that tube, & all you have to do is to be sure to grease the shaft. You can use conventional petroleum grease for that. Some anal types, & I am one of them, feel that the shaft of any of these models should be removed, O-ring(s) freshened if shaft uses them, & cleaned & freshly greased, at every other tire change. It is possible to fit that tube to the 1981-1984 (to 3/1983?) models, but it isn't really needed. The brake cam lever that has those grooves can be updated, but you will likely have major problems getting the correct one, so that is why I say to just change the O-rings. If the rear drive housing cover is disturbed, that tube must be realigned, or you will have recurring oil leaks. Do NOT allow the cover to be misaligned. Try an old /5 front axle for this alignment. Sometime, perhaps after 1983 (3/83?), BMW modified the brake cam rods. The O-ring grooves became shallower, & were spaced differently. It is all rather confusing, & trying to upgrade/update can be a mess. I suggest that all of the cam rods work fine if you replace the O-rings & lubricate the shaft at tire changes.
1981+ rear drum brake pivot shafts: The shaft that has the O-ring(s), will not accept the O-rings, & it will be difficult to install them, if the diameter measured at the bottom of the grooves is not a minimum of 10.41 mm. There was a rear brake cam change as of 08/1989 production on some bikes, and 09/1983 on others. The early O-rings were 10 x 2 mm, and were 36 21 1 239 134. Later, BMW changed that ordering number to 07 11 9 906 328. AFTER 09/83 on some models and 08/89 on others, the O-ring became 35 21 1 457 605, which were 12 x 1 mm. The early O-rings of 10 x 2 will NOT fit nor work with the later cam. It's all messy, due to the various models, when the change was phased-in; and BMW seems to have not followed its own published information all that well either. If you are working on a rear drive & the brake cam rod will not install without it becoming very stiff, try installing it without the O-rings; see if the tubes the brake cam rod fits through are miss-aligned or damaged.
1B. Drum brake linings: www.vintagebrake.com Michael ('Mercury') Morse ....is a great resource for knowledge and parts and advice ...and can even reline your brake shoes with modern material ....and he can arc the shoes to fit your brake drum, ETC!! Ask him about sending your drums. Ask him if he can handle the wheels ...which would be better, as drums distort faintly when re-spoked ...or you can precisely measure the drums & give him the measurements(??) ...... but in any case, contact him, and perhaps send him your old shoes for relining & upgrading the material. He may have suggestions about the drums. DO report back to me about what he says about your wheels, brake shoes, brake pads, etc. (yes, he can supply the proper SHOE materials and PADS).
NOTE: The rear brake drum (except very earliest years models) have 'inspection' slots. These can be used with feeler gauges to check the shoe-to-drum clearance. You can rotate the wheel so to use a slot at various brake lining positions.
2.
Brake squealing: This problem comes up rather often. All sorts of fixes are touted; this includes glues and pastes for the disc brakes on the back sides of the pads, even special anti-squeal shims/plates. Some have used BMW-Brembo CAR type anti-squeal backing plates (dangerous on an Airhead with near stock thickness pads, particularly with any air bubbles in the system, which will expand and pressurize with heat). I strongly recommend you do NOT use the BMW car type anti-squeal braking plates. However, I will supply the information:The BMW Brembo CAR type anti-squeal plates are 34 21 1 116 006. Be SUPER CAUTIOUS! I am hesitant about even mentioning them here! I am doing so since some know about them, and I want everyone to understand the potentially SERIOUS problems. You MUST have a system with no air bubbles in it; and you MUST have pistons that retract properly, and you MUST have CONSIDERABLY WORN PADS, all and more to even think about using these. These can be used on Airheads ONLY if the pads are thinned in thickness first (either sanded or actually worn a fair amount) ...otherwise they could seize. You do NOT want to be riding a bike with a sudden brake seizure!! These plates are particularly insidious for Airheads if any bubbles of air are in the system which could expand when hot and cause the brakes to seize and lock. So, if you intend to use those plates (NOT recommended by me), have well worn pads first, & remember that I told you NOT to install them. Why not, instead of installing those plates, just use the brakes moderately hard from 70 mph to zero, now and then?
Some 'fixes' will work for some time, as will, for a time, changing to a soft material, disc changes, etc. While different models of our airheads are specified with different brake material, they are ALL designed, after break-in, to be used rather vigorously, specifically the design is for the near-worst case ...moderately extreme conditions! That is, BMW does not want your disc brakes to fail under relatively heavy usage on steep downhill mountain passes. Pads tend to squeal from localized, usually small, areas of the pad where the surface has chemically & physically changed, just call it carbonized/glazed, whether or not you can see any visual change. Some squealing ....and ESPECIALLY brake lever pulsing ...will be had if the shoes do not contact the brake cam properly with drum brakes. This can be fixed by using a feeler gauge & very slight brake lever movement ...to see if the cam is contacting evenly across its surface, & if not, filing the shoe metal to match perfectly. In addition, you can try filing down that point of the LOWER shoe by about .004". If the bushing area of the brake cam is considerably worn, you will FIRST have to fix that! Singing of springs can sometimes be fixed by stuffing them with a bit of rubber, or using the snap-on BMW rubber part. Some use some spaghetti tubing over the springs.
Be sure the pins holding the pads in the calipers of disc brakes have a FAINT lubricant on them ...moly or a dry lubricant or even anti-seize compound are all OK. I use a 'dry' moly lubricant.
BMW published bulletins to dealerships about squealing. They noted that the chemical structure of pads & shoes changes with age & temperature, & the material is designed for a very long life, INcluding time. They are designed for high stability under RELATIVELY HARSH conditions. To ME, that means using lots of brakes at a goodly speed down a steep mountain pass, perhaps pulling a trailer, ...etc. BMW noted that deceleration from lower speeds, such as city driving, does not allow the material to get nearly as hot as would braking from higher speeds. Thus, the pads become harder (at the near outer area), causing squealing. YOU NEED to do some MODESTLY VIGOROUS braking now & then to reduce, to eliminate squealing AND to keep good braking. Speed and reasonably vigorous use of the brakes to produce the right temperatures is important here, not just braking quite hard from 30mph ...which is not generally going to be the best. In fact, you don't need to brake terribly hard. You need the linings/pads to HEAT UP, from MEDIUM hard braking, maybe from 70+ mph to near zero. If you seldom use your brakes much, particularly enough to heat them up well, the SURFACE of the pads (especially the outer surface area) will HARDEN & chemically change, and give poor braking ....besides perhaps squealing. IT CAN BE WORSE if your pads are dragging a bit. Doing vigorous braking from 70+ mph, to zero, is particularly important with sintered brakes.
So.....squealing on disc brakes is generally the result of failure to use brakes reasonably vigorously now and then, or having excessively dragging pads. Once in awhile it is warped discs or carriers or pad surface problems, often in conjunction with dirty discs (OFTEN the disc HOLES are grungy, & when warmed-up, release oils and various types of dirt). MOST of the time, NOT ALWAYS HOWEVER, if I hear a BMW near me that is squealing, I usually guess that the rider does not use his brakes much. MARK the pads when removing them, so they can be put back into the original positions. If you remove the pads, an easy job, you can place them on an upturned piece of fine grit sandpaper (NO emery or other types!!) on a flat piece of glass; whatever; and make even-pressured figure-eight motions, & remove a SLIGHT amount of material. If the pad has grooves filled with crud, clean the crud out!
IT IS IMPORTANT that the disc holes/slots be thoroughly cleaned out ...use whatever means, including lots of Q-tips, with a fast drying solvent (regular brake cleaner is NOT very strong) .....and note that just because the holes appear clean does not mean that they are. If the holes are not cleaned, the crud in them will re-contaminate the pads. Clean the surface of the disc, then holes, then disc, then holes, back & forth until no more black crud comes out. I clean the disc surface; after cleaning the disc holes (Q-tips & strong solvent); with very fine grit sandpaper, then a clean rag. If you change the type of pad material ...in fact, I recommend this for any pad change, even the original type of material, ... you should not just solvent clean the discs, but you should clean them up with maybe 500-600 grit sandpaper (never emery or other nasty papers), as some INVISIBLE old pad material almost always has been invisibly carbonized/glazed onto the disc surface. Finish by cleaning up with a good solvent, or at least detergent/water.
I have had many questions about REAR brake squealing. Here is some additional information from BMW, condensed for you. This information was in TWO BMW bulletins, called SI's for their official name: Service Information, & their identifications were: 34-013-88 (2296) and 34-011-86 (2230):
This information applies ONLY to the REAR DRUM brakes: The application here is for any drum brake with shoes that are 25 mm wide (that is, 1 inch). This means ALL rear drum brakes from 1985, & it also includes some older bikes, such as the R80G/S & the R80ST. NOTE that all bikes FROM 1987 should already have these modifications. Check your bike! According to BMW, one should take the approach in steps.
Do step #1 first. If squealing is not eliminated, do step #2. This first step, #1, is to install rubber dampeners. These rubber dampeners are installed ONLY on the REAR return spring. The FLAT side of these is installed against the brake shoe & pivot cam; the slant side is to face left (towards wheel).
#34 21 1 457 602 is 55 mm long; is for ONLY the K75 that has sand-cast shoes.
#34 21 1 457 572 is 70 mm long; is for K75 with pressure-cast shoes, & the R bikes.
Step #2: If squealing not stopped by Step #1: Install later brake shoes, that have a revised place to hook the spring to ...it increases tension. I highly recommend you change the springs too. How do YOU KNOW if you already have these shoes? There is a circular stamping, with the numerals 86 in the center. It is unclear to me if even later shoes might not have later numerals in the stamping.
BMW's updating & identification of the parts & parts numbers has been confusing regarding the above items. Check with your dealership for the latest information & latest part numbers; you may or may not have the updated brake shoes.
One of the causes for disc brake squealing is failure to lubricate the pins holding the pads to the caliper. I remove them. I tap them with a drift from the other side, then pull straight-out ....so as to not break them ....and I polish them a bit on a steel wire wheel on my bench motor. You can also do it with very fine sandpaper. When lubricating the pins surface, use a FAINT trace of moly grease; or, faint trace of anti-seize compound or silicone grease. You can also use a dry film lubricant. Do NOT goop the pins so much that grease could fly off into the pads or any other place. Keep in mind that some greases will thin & melt when they get hot. The faint amount of grease should include where the weirdly shaped spring fits the pin. I personally, usually, not always, use a dry lubricant, or anti-seize. I cannot overemphasize, DO NOT goop it thickly. A single tiny drop will be more than enough for the two pins. The pin MUST be clean & SMOOTH first. Be sure to fully insert the pin.
Various goops are available at auto-parts stores & dealerships & brake stores. They are touted to eliminate squealing. They are applied to the backing plate of the pad, so they are, in effect, a very thin layer of absorbent/lubricant, between the pad metal & the metal caliper piston. They sometimes DO work, often do NOT last in their effects. I do not recommend using these. If you want to try the idea, you can clean the piston & the metal backing of the pad (use fine sandpaper for both) and then apply a dab of silicone dielectric grease. I suggest you do not ....the silicon is not good for any rubber parts it might get onto, later.
3. Do NOT mix up the locations of pads, that will cause you to have to break in the pads to the disc again, & your braking will be poor for awhile. This is particularly so with the swinging ATE brake calipers.
4. ATE models of the swinging caliper type disc brakes have an adjustable cam at the bottom of the brake caliper. This cam part (or, call it a pin) must be cleaned & lightly greased (antiseize compound, lightly, is BETTER) and adjusted properly. You can use an ink marking pen on the inside of the disc, & adjust the cam to give equal erasure as the brake is very lightly applied, wheel rotated. If incorrect, braking is poor, & squealing more likely. There is a better way than the ink marking pen, feeling the two positions of the cam, etc. Procedure may still be on the Airheads.org website under Technical Tips. If no longer there, ask on the airheads LIST.
ATE swinging caliper cam pins are occasionally found frozen, & seem difficult to remove. Go to the hardware store and get an M8 x 1.25 bolt about 2-1/2 to 3 inches long. Screw it into the pin; use a ViseGrip pliers, strongly attached, to the head or shank. Hit the pliers downwards with a medium-sized hammer. The pin will now come out. Do NOT forget to use a thin amount of antiseize compound when replacing the pin. It is possible the pin will be bad, if so, you will have to replace it if you cannot clean it up. Another method is to get a M8 x 1.25 longish bolt, and screw it into the ATE pin, using a washer and an appropriate size of diameter of socket as a sleeve, and draw the pin out.
ATE master cylinders, of the type that are mounted under the fuel tank, have some peculiarities & caution requirements (besides the tendency to have a hidden bubble of air, perhaps at the switch). Do NOT overly tighten the cap, as the rubber gasket will squish a bit out & you will have a leak. If the MC is a bit too far to the rear, the terminals can contact the fuel tank & cause the BRAKE warning lamp to come on, & often this is intermittent as the fuel tank can move around a bit during riding. Loosen & move it forward. This same sort of electrical problem can occur if the round rubber sort-of-half-tube thing that cushions the FRONT of the tank is deteriorated.
ATE under-fuel-tank master cylinders require an adjustment, which was done with a special U-shaped flat metal tool, that BMW provided in the owner's tools. This tool is sometimes thought as for just setting the master cylinder piston for the amount of free play at the handlebars brake lever. The real purpose of the tool is to be sure the piston in the master cylinder sticks outwards the correct amount, so the bleed-back hole in the MC is not 'covered'. The handlebars lever free play, which is not critical, is to be 0.16" to 0.24", as measured where the lever end contacts the casting. When the lever is not under hand pressure, the BARS lever end CONTACTS the bars casting; just to make this measured point clear in your mind. To set this bar lever free-play, by some published methods, you must remove the fuel tank, & insert the special tool (pry off the rubber cover) into the master cylinder after loosening the cable adjuster locknut located at the MC. There is a groove in the MC piston for this gauge. Adjust so the tool is JUST free to move, then tighten the locknut. The gauge tool should be flat, smooth, & the thickness fairly close to the original. I measured an original one, in case you want to duplicate it: The thickness of the metal is fairly important, the original one was 0.046" THICK. The tool length is not important, the original was about 2". The width of the tool was 0.592". The slot in the tool's long end was to a depth of 0.642" with a full radius at the bottom; the slot width was 0.363". It is certainly possible to do the adjustment without the tool. You can also make the tool of different dimensions, just keep the THICKNESS.
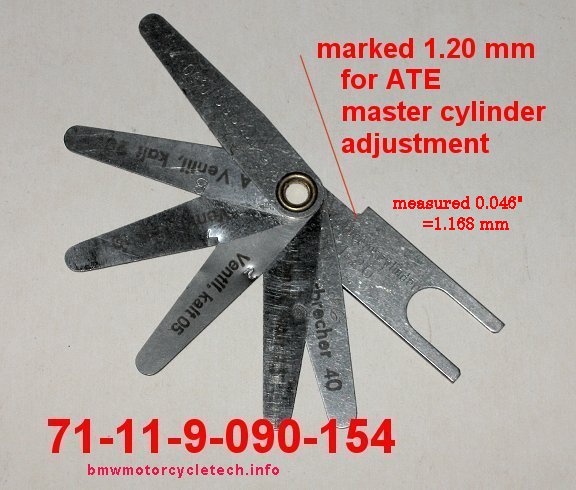
Here are a bunch of photos of a rebuilding of an under-fuel-tank-located ATE master cylinder:
http://s428.photobucket.com/user/gruntyman66/library/78 R100 14mm Front MC Rebuild?sort=2&page=1
Here is an article by Brook Reams on overhauling the ATE systems, including a home-made method of 'honing' the ATE under-tank master cylinders, and closeup photos of rebuilding one of these:
http://brook.reams.me/bmw-motorcyle-rebuilds/1975-r756-build-s-replica/34-bmw-r756-rebuild-master-cylinder-disk-caliper/
5. Use of "HH+" rated material will produce better braking with less pressure needed at the handlebars, with the usual caveats on braking use. A noticeable improvement in braking is had with Meonite cast-iron rotors, but I do NOT recommend cast iron over the stock material, & it is not easy to find (one Canadian producer?), but it DOES work, but may be heavy, & due to the weight, affect handling. The degree of "better braking" with various changes "varies". Maybe a bit better braking from stock by installing full-floating SS discs, like those from EBC (and add a bit by using HH+ pads). Often a modification does NOT help braking. Always install new pads AFTER first super-well-cleaning the disc! ...that means the holes, the outer disc surfaces, & using very fine grit sandpaper prior to the final solvent cleaning of the holes & flat surfaces. Brake pad material should be compatible with your disc material. If you use all BMW discs & pads, you don't have the problem of figuring it all out. All the above is not meant to warn you excessively, as I have NOT YET seen any HH+ pads that are NOT OK with BMW discs or EBC discs. You can spend a lot of money trying to improve braking, by purchasing or adding discs, pads, SS braid covered hoses, etc., and end up with hardly any improvement, due to failure to consider everything ...AND ....that includes failure to PROPERLY break-in the pads (which varies with pad material) is often the cause of poor braking.
The BIGGEST improvement will be had from modifications to install 4 pot calipers. Often you will not have to change the master cylinder to a larger piston size. Sometimes this, over-all, can be cheaper! More on that later in this article.
If you change pads, remember that initial braking can be poor, until the pads break-in. This is particularly so if going to a new type of pad containing, perhaps, copper or other metal. This can happen with BMW's own pads too! It is especially critical on the swinging ATE calipers, if not aligned correctly. IT IS ABSOLUTELY NECESSARY TO CLEAN THOSE DISC HOLES or SLOTS BY THE METHODS I HAVE DESCRIBED, PLUS USING SANDPAPER! It is VERY helpful to clean the discs on both sides with a very fine grit paper, I use sandpaper (or silicon carbide paper ..but not recommended by me for most of you). I am VERY particular about using Q-tips & strong solvent to clean each & every hole in the discs ...cleaning the disc, & holes, over & over, before the final sandpapering, cleaning, & ONLY THEN installing the new pads. Do moderately strong stops for first 100 miles or so, & then the brakes should work OK, but DO follow pad maker's instructions on break-in. If you fail to clean the small disc holes properly, the disc, which heats up in normal use, can release oily grunge, and contaminate the disc surface and also contaminate your nice new pads! The discs themselves always have an invisible clear hard glass-like coating from the pads, which is why the sandpapering. Some brake pads have different break-in requirements ...ASK!
If you are trying to break-in new pads on worn grooved discs, be slow, but moderately firm about braking for awhile.
There are rare instances of disc brake pads that appear to expand with age. It takes a good look-see to find the problem. The problem is delamination & friction pad to backing steel problems. Change those pads NOW!!! If they come apart, you could be in for serious trouble.
6. BMW sold both single and dual disc braked motorcycles, and occasionally the second front disc was available as an extra cost option. Single disc models can be converted to dual-disc, typically by changing a lower fork leg, usually from the opposite side. This can increase braking power a fair amount, if at the expense of somewhat poorer handling due to the weight added. NOTE that increasing braking power is not the only advantage of having dual front discs. One advantage is that it eliminates any tendency for the ON-braking sideways movement of the front end, which causes, obviously, somewhat of a slight to moderate turn.
Once the system is fully bled & the lever feel is relatively hard & not spongy, & if the lever does not pull back too far...a TYPICAL situation, ...then there is NO need to change the master cylinder piston/bore size. To explain this, know that BMW will typically use a larger piston in the stock MC size when BMW themselves install a second front disc. I think that is OFTEN wrong for the best braking, & I advise you to FIRST try the original smaller piston MC. The stock smaller master cylinder size will produce more braking for a given squeeze on the lever, & this can often be completely safe, ...IF....the lever does not come back too far towards the grip. AGAIN, note, this is only for a properly bled brake system that has a reasonably nice hard lever feel. In nearly every instance I have personally worked with, where I have added a second disc & then used the same type & size of original MC & caliper, no master cylinder change of size was necessary ....nor desirable. Thus, if YOUR particular system works fine with the added second disc with the original size master cylinder, you have that extra advantage of the smaller MC bore size for more braking (compared to what BMW used for DUAL discs), & no need to change the MC. Most will appreciate the slightly different feel to the brake lever. However, my experience is that an upgrade to a 4 pot caliper on a single disc (that is, not adding a second disc) works out much better than adding a disc, and often cheaper too!
Be SURE that bleeding is done properly, before analyzing the amount the lever can come back. The size of the master cylinder, the leverage design/pivot point, caliper size, etc., were selected by BMW for a certain FEEL at the lever ....one wants to be able to have a feel that is hard to describe, but you know it when you feel it (sorry for the pun). In addition to that hard-to-describe feeling, which is not 'wooden', you want to feel, via sensitive braking lever response, the wheel slowing down, before any locking-up (IF that were possible, typically not on most stock Airheads on dry pavement with good tires). The "feel" is usually good with an extra disc added & the original master cylinder. But, YOUR case may be different. All disclaimers apply here! BUT, you have little to lose in trying to use the original MC, just a bit of your labor to find out if it will be OK. SO ....ONE of the things I recommend, see prior paragraphs too, is that if converting from single to dual-disc, you do NOT initially change to a larger bore master cylinder. Try the stock one, and properly bleed the system before making a judgment.
IF you are replacing a master cylinder on a stock brake system (not adding a disc) due to its having failed & not being re-buildable due to damage, perhaps typically deep pitting of the bore .... you can consider a 1 mm, sometimes 2 mm, DEcrease in master cylinder bore diameter. BMW has many different master cylinders available, especially for on-bars type. Unfortunately, those with the G/S and ST, who have single discs, & who want more braking, have a limited selection of master cylinders from BMW, and may have to go to the aftermarket. My statements and advice, cautions, etc., come from my own shop's experience and my own work. YOU are on your own, I am NOT responsible for you, your bike, your safety.
7. There is a "standard and accepted" left & right sides to front wheels. The disc brake carrier mount nuts & the axle nut are to be on the left side. That means left side as you sit on the bike. Not making the mistake of reversing the wheel will avoid caliper adjustments (ATE mostly but not at all entirely) or having to break in the pads again to conform to the fitment. It can also prevent you from having your front tire run the other way, as most are directional. Tires are often marked for direction, via arrows on the carcass. There are even front wheels so marked on the rim .....some discs also have arrows for forward direction. You may want to mark your wheels.
8A. ATE Conversions ....using various BMW parts, etc:
A conversion commonly done to an early under-gas-tank master cylinder (ATE) Airhead to use the on-bars type of master cylinder. What often confuses folks is just how & what parts are needed. Many folks do a PARTIAL conversion. Here is the complete list of parts for the FULL conversion:
b. 34 32 1 241 565 is the upper brake hose for USA type bars. If you have low bars, you need the appropriate length of upper brake hose.
c. 32 72 2 310 747 is the 14 mm throttle and master cylinder assembly for years 1985 onwards, this allows the keeping of your stock dual throttle cables. NOTE: -746 is the 13 mm version.
d. 34 32 1 242 205 banjo bolt, to connect the upper hose to the MC.
e. two each 07 11 9 963 072 crush gaskets for the banjo bolt.
f. 32 72 1 457 038 the cam gear for 32 mm carbs for the handle bar MC assembly
g. 51 16 1 237 641 RIGHT side mirror, with SHORT stem, for the USA bars, as the stock mirror will not fit the wider handlebar assembly. For low bars, get the LONG mirror, or, whatever matches your current LEFT mirror, unless you are using bar-end mirrors, or? If the bike being converted is such as an RT, which has the mirrors on the fairing, then this information does not apply to you.
h. 07 11 9 919 112, plug, for the right side of the 'distributor'. This plug is NOT needed if you have dual-discs.
i. If your throttle twist gear is worn, you will need 32 72 1 454 129
j. If you want a new brake switch, it is 61 31 1 244 334.
It is OK to obtain some of above items USED, but I'd suggest a NEW master cylinder assembly.
You can convert a single disc ATE system to dual disc by using 1979 parts ...a right slider lower, the caliper, the disc. You probably can use the existing MC.
The stock turn signal switch will attach to the new throttle/MC assembly; the stock lower brake hose attaches to the 'distributor'. Use the stock BMW upper brake hose, don't use an uncovered SS braided hose. Possible: run a hose directly to the caliper, avoiding some parts; YOUR decision.
Twin-cable throttle assemblies from a 79-80 R65, or 1985+ models that have such, will fit. You CAN use a 1981-1984 throttle assembly, but then you need to convert the throttle cables to the one-into-two cables setup. I believe the one-into-two is a BETTER more stable throttle setup.
Master cylinders come in many bore sizes. Smaller bores mean more lever movement but more braking for a given hand pressure. Lever FEEL is also involved, & FEEL is not the same as pressure. Generally, folks use 13 mm bore MC for single disc conversions, 14 mm for dual-disc. I don't much like the 15 mm. Two different under-tank splitters are available; three holes & four holes. You decide what you want to do, with the brake switch in the lever or in the splitter.
Another problem area: You might be thinking of grafting on a R90S dual disc brake setup; ...let us say you have a 1974 /6. You will find the TUBES spacing to be different! That means you need triple clamps. You will need 1975-1980 dual disc ATE Lowers, the 17 mm axle, etc. You could use the ATE calipers. Finding an entire R90S front end, complete, is not likely. Some may just look for a later model front end, using Brembo calipers.
8B. OTHER information, ATE, Brembo, Caliper improvements, etc.:
BMW used both single & dual throttle cable models. You may need to keep that in mind due to the master cylinder being part of that assembly. The internal cam is not the same for both 32 & 40 mm carburetors. I think that is NOT going to bother you.
One of the 13 mm master cylinder on-bars had two cover versions. You can do comparo's via on-line fiche. The MC's like this were common on many models back to the 1980's. Take a look at 13 mm 32 72 2 310 746. Then take a look at cover 32 72 1 457 039. Note when looking at fiche that internals varied. Euro & USA were not necessarily the same. The R80 and R65 assembly innards can be different (throttle cam/chain assembly, for instance) from the R100 engine'd models. Many used the 33 mm cam disc with 15 mm hole. Look carefully.
When one contemplates a conversion, sometimes what comes to mind is to go further than simply adding a disc or changing master cylinder bore sizes; which, even with HH+ linings, is NOT a HUGE improvement, but IS a substantial improvement. Maybe you are thinking of upgrading the braking on a later model Airhead that already has the MC on the right bar area. Even with the stock on-bars or under fuel tank master cylinder, changing the caliper(s) to ones with more spots (pistons) is a way to gain a LARGE improvement in braking, even if both pistons are smaller than the one piston in the stock caliper. You are increasing the total piston area, & a small caliper piston diameter increase is a large area increase (remember 2 pi R squared?). In addition, and in general, as calipers improved over the years, they became stiffer, and therefore had less distortion when the very large hydraulic pressures were applied during operation & that alone improved braking somewhat.
A popular conversion method, particularly in Europe, is to use a BMW Oilhead or K bike caliper. Both left & right sides are used, each comes with its own USUALLY SMALL problems. You can use the LEFT Oilhead Brembo caliper from the earlier Oilhead years, & it is then mounted to the RIGHT side of the Airhead BREMBO mounts. You need to mill about 4 mm off the mounting surface; the larger piston then becomes the leading instead of the trailing piston, leading to weird wearing patterns, but a substantial braking improvement. You can use the stock Oilhead brake pads. Detailed information is on the following website: https://www.powerboxer.de It is in German, so use a good translating program (the one in Google Chrome, for instance).
Another method is not to use the other side type caliper, & mount to the side not having the disc (of course!) by whatever milling or spacer, etc., is needed.
All sorts of combinations have been done. Swapping can be done for both sides, using the Left-Right, as described above, and reversing for the LEFT side of the Airhead (that means using the RIGHT Oilhead caliper at the LEFT airhead side). If I was doing this sort of conversion, I probably would try to get the two Oilhead calipers from one motorcycle at such as a BMW salvage yard. The earlier Oilheads calipers have identical bolt-hole spacing & only need approx. 4 mm milled off the mounting tabs. The 4 pot caliper uses 32 & 34 mm pistons. For those interested, the 2 pot units on the GS are 48 mm. The 4 spot calipers from classic K bikes, as well as from Oilheads, will likely fit, with a little milling to the mounting tabs. If the mounting hole center to center distance is the same as your Airhead mounting holes, this is going to be a relatively easy job. The Airhead mounting holes of 108 mm spacing will accommodate these 4 spot calipers easily.
While the dual-size calipers have some modest advantages & the later calipers are stiffer ....the major increase in actual braking comes from the increase in TOTAL caliper piston area. Calculate from the area of a circle: each piston has an area of its radius squared times pi. That means that a 38 mm piston has about 1134 square millimeters of area ...as one example. Add up the total caliper piston area and compare to the unmodified system total piston area.
8C. General discussion, adding a second disc & effects of master cylinder size:
When BMW installed the optional twin discs with the original ATE system, they went to a larger ~16 mm master cylinder. BMW did the same thing when it dropped ATE & went to Brembo brakes & then went to twin discs on a single disc motorcycle. I believe that BMW is overly-conservative in their selection of master cylinder sizes.
Since you might be thinking of this, BMW has almost always used the exact same OVERALL leverage at/for the master-cylinder in conjunction with the brake lever itself. This means the leverage between the M/C plunger or cable point & handlebar lever pivot point, said lever being a teeter-totter around its pivot bolt ('fulcrum'). This is easier to see/measure for the on-bars master cylinder units, but more difficult for the under fuel tank types, since there is an additional fulcrum at the master cylinder itself, plus, of course, the one at the bars lever. If you change the master-cylinder bore size you also change the feel & effect on the brakes ... per hand pressure amount. Brake Feel is hard to describe. Variables include bleeding quality; pad & disc irregularities, stiffness of calipers, hoses condition & flex, temperature changes, etc. BTW...the rear brake is similar over the years, in leverage, OVERALL.
I personally prefer upgrading the Airhead brakes to twin-discs with 4 spot calipers for each. This is as opposed to just adding a disc with a stock caliper. Upgrading the Brembo twin disc Airheads to 4 spot calipers also works very well. Your braking will improve by a HUGE amount by converting to 4 spot calipers. For the best handling and a very substantial braking improvement, use of a SINGLE disc & a 4 spot (or even 6) caliper of substantial bore sizes, will be VERY adequate and a VERY large improvement, on such as the ST and other models that came with one disc.
BMW offered dual conversion kits for various models. Kits are likely obsolete; but, never hurts to check on this. Maybe if a kit has been on the shelf a long time you can make a deal. I never bothered to write down all the kit numbers. You will NOT get the performance from one of these kits, as you would from 4 spot calipers from another model of BMW.
SUGGESTION: investigate using R100R calipers.
Tradeoffs when using the stock original smaller master-cylinder & adding a disc, or larger surface area caliper(s), etc:
(a) The handlebar lever will move further, as you have more fluid moving. However, this is usually only a small amount more of lever movement so long as you don't go overboard on adding discs/calipers. See (b) and, especially, (c).
(b) The 'feel' of the lever will change some. You might describe it as being slightly more spongy. This may be offset a fair amount to your liking however, by your enhanced ability to modulate small amounts of brake force. I have found that most don't complain because their prior systems were worse!
(c) You need to bleed the brake system more carefully than if using the original master cylinder piston size, as if you leave any bubbles in the system the lever could move backwards too far. I've never seen a real problem if the modifications were done properly.
8D. MORE on conversions:Sometimes someone modifies the brake system to use a later type of caliper which has unequal piston sizes. It might be mounted to their Airhead such that the caliper's LARGER piston, normally being the exit section (tire rotating normal direction) is mounted backwards from what the manufacturer intended. This situation often comes about when using a caliper from the wrong side of the donor bike. This, with the pads off-gassing, results in somewhat less braking. Sometimes that is necessary: This type of problem can be somewhat minimized by using drilled or slotted discs and high friction pads. Staggered size pistons calipers are staggered in size specifically to help with the molecular surface out-gassing problems. Modern motorcycles with the latest type of discs, calipers, & pad compounds are much less susceptible to this problem of gas-hydroplaning, & may not even have drilled discs. Beware of using the wrong pads!
All sorts & types of conversions have been made to 'upgrade' brakes. As you have read in this article, one of the best ways to obtain improved brakes is to use the same make of caliper, but to use a caliper with more piston area. Multiple spot brakes. Oilhead & K bike brakes. Yes, you could convert to a Japanese bike multiple spot caliper(s), they are often cheaply available. I prefer to use the Brembo 4 spot calipers, as in the photo below or similar Brembo calipers, as has been noted above, as the installation is likely to be rather easy, over-all. You can expect performance to be even better than on a Classic K or Oilhead, because the Airhead is or can be LIGHTER; and, you may well be using a 1 mm or even 2 mm smaller piston size in the MC. For even more powerful braking, use a 6 spot caliper on both front discs or a 4 spot caliper on each of two discs.
If possible, I advise you to to either consult with someone who has already done the SPECIFIC conversion you contemplate; or, you can calculate the total increased piston diameter areas, compared to stock, and then get a good idea of any change possibly needed in the MC bore. Since it quite often will work out that the stock original size MC is going to be OK, MY SUGGESTION is to FIRST try using the original stock bore master cylinder. Some conversions have been done and posted to Adventure Rider, with details.
MY INFORMATION is not any guarantee that YOUR work is going to operate correctly, safely, & all the other lawyer-ese things. However, if your conversion/modifications are done neatly, with good workmanship, proper milling (if needed) or adapter plate, both done flatly & squarely, & everything bolts-up & lines-up properly & with NO free play in mounting bolt area, etc., then you are likely going to be VERY pleased with the results. Do NOT do this type of conversion without considering the risks if you do not do things properly. I'm NOT responsible for your poor judgment nor poor workmanship!
Some aftermarket sources have brackets specifically designed to allow the mounting of multiple-piston brakes to your bike. Check into that!
9. Improving brakes, general statement on methods:
This is a sort-of summary & general statement. There are limited ways of improving braking (well, let's say improving stopping force), some improve braking greatly, some only a small amount, most changes are in the middle area (such as just changing pads to higher friction types), although more than one change may well add to the over-all improvement. For most, the better stopping is had by keeping the same, or even lower hand pressure on the handlebars lever, trading, so-to-speak, for longer movement of that lever. For disc brakes, one approach is to increase the caliper piston area (piston size, number of pistons). You can also increase the disc diameter and reposition the caliper to take advantage of the size increase. This tends to be expensive, or, just involved. More caliper piston area is usually good, as is lowering the piston size in the master cylinder. Often, both are done at the same time. Just doing the master cylinder piston size change may be enough for you. You can't go too far with these changes, or the hand lever will come back too far. If your rubber hoses are in good condition, going to braided SS covered hoses may gain you nothing!! ... or, gain you PROBLEMS!
Few seem to consider the direct lever ratio (two in the ATE swinging caliper bikes). What that ratio means, is the ratio of the effective length of the part of the hand-lever that operates the master cylinder, versus the length of the part of that hand-lever that your hand fits onto. This is a classic teeter-totter. In some instances the leverage ratio can be changed.
Once a DRUM brake system is in good condition, improvements are often difficult. Friction material change, leverage change. Most other methods are too costly (such as larger drum size).
10. Actual conversions:
First below is a simple conversion, done to a R80ST, that greatly improves the braking over the stock brake, here a Brembo 4 spot brake was installed. Only a bit of milling was needed on the caliper in this 'easy' installation. In this conversion, only a small amount of material was milled on the backside of the mounting tabs of the caliper. The caliper mounting centers distance was the same as the stock distance on the fork lowers. This makes for a VERY nice conversion. Note that this particular conversion uses a floating disc, giving somewhat better performance. EBC makes floating disc assemblies, cheaper than BMW original non-floating parts. If you had TWO of these brake conversions on your front wheels, with HH+ pads, the increase in braking power would be very large, at the cost of a modest amount of handling, due to the increased over-all weight of the movable part of the fork assembly, usually called the Unsprung Weight.
This is just ONE example of MANY ways to improve braking action; & does not reflect any specific recommendations for using a conversion, of any type, including a right side caliper on a R80ST; or, a left side conversion (not shown here). These photos are just to show ONE example of how simple a conversion can be.
An even simpler conversion ....would be one where the caliper does not need any milling of the mounting surface; nor, do you have to make up anything to allow the caliper to match up with the existing mounting holes on the fork leg.

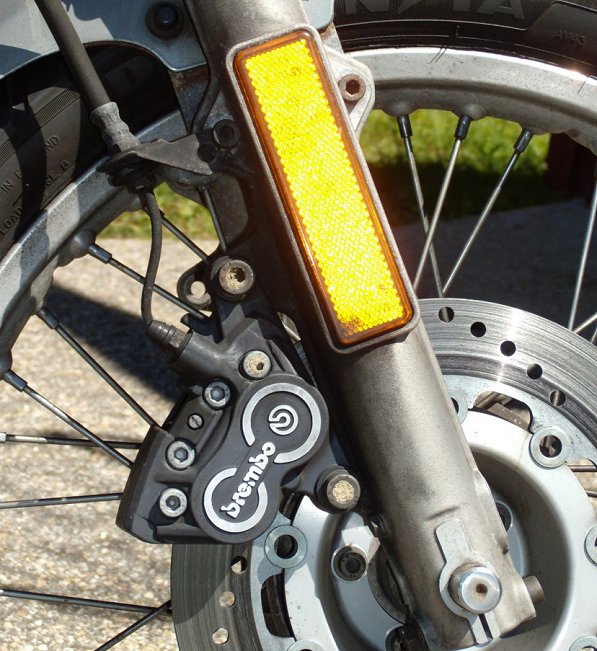
Here is a conversion to a R80G/S:

Here is a write-up, and commentary, which I am not endorsing, but will give you ideas:
http://advrider.com/index.php?threads/so-you-want-better-brake-on-your-r100gs-why-not-a-4-pot-brembo.625343/
Everything else (??).
Includes a lot about stainless steel braided hoses.
Some repeats & emphasis.
Bits and pieces of information.
1. DO NOT use high pressure water spray while cleaning your motorcycle, where that spray would get into the master cylinder or into the braking system or wheel or swing arm, etc., bearings, ETC.... by various almost microscopic means.
2. Longevity of BMW Motorcycle brake hoses; specific problems ......and discussion about SS braided-covered hoses:
Although the following problem used to be rare, it is not all that rare nowadays. The BMW stock brake hoses are VERY good & LAST for DECADES if you do not hang the calipers by the hoses, and if you do NOT use a clamp or pinch device on them (which some did and still do, unfortunately, to stop fluid flow during some types of servicing). NEVER EVER do those things! Those BAD practices CAN excessively bend or squeeze the hoses INTERNALLY. It is quite a BAD THING to hang the caliper by its hose and thereby bending the internal tubing at the end fittings. The initial damage from these various things is almost always HIDDEN. The small diameter, and thin, internal stiff plastic tube, can KINK. The thick rubber hose, whether SS braided covered OR NOT, covers that small diameter internal tube. The kink may produce a partial-one-way flap to fluid flow.
Bad hoses from normal use are actually quite rare. It MIGHT happen eventually, but I have seen MANY ...probably MOST ...that went 1/4 million miles & are several decades old, that were still installed and still fine. I've had no problems using most of them at 30 years of age after testing. My testing includes feeling the hose(s) over their length while heavily pressuring the lever, checking for serious bulging, and checking for fluid returning in the master cylinder, etc.
If yours are cracking, or bubble-bulging under pressure, replace them. Slight straightening movement under pressure is NOT a good reason for replacement. If the hose is internally damaged, sometimes you will find out by seeing a large bulge in the rubber hose when you put a fair amount of pressure on the lever or pedal. If the hose was old, and removed, and then replaced, if you cannot put it back in the same curvature position, replace it.
SOME stainless steel braided hoses are particularly susceptible to internal damage, having extra thin and/or extra small or poorer tubing in some way, perhaps less flexible or easier to kink. Some, even when brand new, have slow fluid return. In my opinion, ALL aftermarket SS braid covered hoses are at least somewhat poorer than the stock hoses, & POTENTIALLY FAR WORSE. Few SS aftermarket hoses will pass the official Whipping Tests (ask!...and ask for a copy of the certification and testing results!).
There is a LOT of pressure from the master cylinder, into the hose & caliper(s) when using hand or foot pressure. That pressure needs to relieve itself when the lever is released. When the lever is released only a quite small amount of fluid returns to the master cylinder, & it needs to do so at a fairly fast rate, so internal hose tubing size really does matter. In some instances of NO damage, or with damage, the fluid returns too slowly (hopefully it DOES return) ...this can give you problems with short interval multiple braking attempts. After the major part of that pressure is relieved (one hopes), by releasing the lever, the final bit of pressure relief effect is from the caliper piston O-ring deformation, now pushing the piston back a quite small amount. There is NO SPRING pushing the piston back into the caliper EXCEPT that very small spring effect of that distorted rubber O-ring, a square-sectioned one, that surrounds the caliper piston. It must return the piston into the caliper a tiny amount AND seal for fluid. This is how disc brakes work by design.
If a flap or kink develops in the inner tube of the hose, or the caliper/piston is corroded, or the tiny return hole of the master cylinder is clogged or partially clogged, the pressure maybe only partially relieved, at best. Even a partial non-release will cause problems, the least of which is, after awhile, a change in the surface of the pads; MAYBE some squealing; USUALLY poor pad friction. To make this clear, the pressure might be released very slowly, or not at all, or incompletely. One of the worst situations would be enough heat from enough pad friction when you are not wanting any braking ....to allow brake fluid boiling (easier with old fluid!), causing bubbles, leading to NO BRAKES after you are riding awhile. Another bad situation is that the brakes could also freeze-up ....suddenly. One way THAT happens is that excessive contact pressure from pad to disc causes excessive heat in the caliper; eventually the fluid expands/boils, & you can get very sudden full-on braking ...actually, so hard that the front wheel SEIZES. Over the handlebars YOU GO! ...or, you slide-out. That is not the only way the front wheel can seize up, due to the brake pads not releasing ....they can even do something similar to welding to the disc.
Many aftermarket Stainless Steel braided hoses have POOR internal construction; some are so bad that the fluid return is not fast enough during multiple short-time braking efforts due to the inner tubing having too-small a diameter. Another problem with some aftermarket SS hoses is that they won't pass the industry standard WHIPPING test ...a test of constant flexing to simulate long term use. The 304 SS material will work-harden, then can break; also the bad braiding area can rupture ...& you get a bubble situation that can blow out. SS hoses are NOT just SS braid covered "standard" rubber hydraulic line hoses. SOME premium SS hoses WILL pass whipping tests. ASK for SPECIFICS!
If you use SS hoses be SURE that the OUTSIDES are covered by plastic tubing ...not just to protect painted surfaces, but to HELP, somewhat, to avoid the common SS hoses/lines failure modes.
Except for racy appearance, I do NOT like SS braided hoses. There are some situations, such as adding very long brake hoses for such as a sidecar rig, that ARE slightly helped in braking performance, with SS covered lines, due to reduced straightening effect in long curved hose areas. I often prefer, even then, to have regular hoses, and just add a zip tie or two ....(better, is adding aircraft quality clips) in instances where the SS braided hose is moving around a lot. Some installations use SS braided hoses and junctions or distributors, and a flexible rubber hose, not SS braided, goes from there to the wheel. That can be a good method ....because the SS braided hose is NOT flexing a lot, or not at all.
Since some have had trouble visualizing the situation, here it is presented somewhat differently:
The fluid in your braking system is DOT3 or DOT4, it does not compress, even if it has some dissolved moisture in it. Most liquids do not compress, although bubbles of air or liquids in gaseous state certainly will. When you pull the bars brake lever backwards, the master cylinder piston pressures the fluid between it and the caliper pistons. Because the pads are so close to the disc already, usually ever-so-very-lightly touching the disc, the pistons/pads do NOT hardly move much, even for the strongest braking effort, and that also means only a quite small amount of fluid moves. When you release the brake lever, only a very small amount of fluid moves back towards the master cylinder from the QUITE HIGH pressure being used in the MC, hose, lines & caliper. The amount of fluid may be well be a fraction of a teaspoonful. The high pressure of the pads against the disc has now been released ...but there is still too much friction contact for a full-enough release!
The squeezed-warped-twisted rubber O-ring that surrounds the piston (& also seals against leaking fluid) provides SOME SLIGHT FORCE to return the piston into the caliper as it tries to return to its regular square O-ring shape; ....but the resulting movement is quite SMALL. Since the fluid pressure was already released, the only force returning the piston inwards, by a FEW thousandths of an inch, is the warped/torsioned/twisted (use whatever words you want) square sectioned rubber O-ring. Thus, the slightest clog in the MC tiny return hole ...or a one-way kink/flap in the inner hose anyplace ...will either slow down, or prevent, the piston from relieving enough pressure on the friction pad. The pad and disc will now heat up as you continue to ride. The friction pad transmits the generated heat to the disc ...and to the fluid & caliper. This is why a corroded piston presenting extra friction to the rubber O-ring, and/or perhaps a one-way flap, and/or bad return hole, etc., is so dangerous to your health, as the rider.
When you pull on the lever, the pressure in the tubing is monstrously increased, which can easily force OPEN any 'kink' in the hoses, allowing the caliper pistons to pressure the disc. Upon lever release the pistons do NOT RETRACT FULLY, IF AT ALL. This leads to high wear of the pads, overheated & warped discs, excessive deterioration of the fluid, & potentially BAD things to YOU if the brakes seize, or disappear.
BMW hoses are not usually very long, which tends to minimize the potentially SLIGHTLY softer feeling from using non-metal-braided hoses. Properly bled brakes using rubber hoses have a FEEL of the lever such that the brake lever is NOT super-abruptly-super-hard. You would NOT like it that way, as you would find it MORE difficult to properly engage the exact amount of braking you want. Additionally, BMW selects master cylinder piston sizes, which, together with the pivot point BMW and lever teeter-totter values selected at the bars lever, gives a certain FEEL for the lever. BMW is quite conservative regarding master cylinder size, in my opinion. This is why smaller master cylinders giving increased braking per effort amount are popular; and safe if one does not go too far. Smaller CAN ALSO MEAN using an existing size master cylinder and adding a second disc and caliper, or, a larger capacity caliper.
MUCH of "your brakes are better with the SS hoses" is a bunch of nonsense; you are being sold something so someone can make money off you. Installing new hoses (or, opening any part of the hydraulic brakes system) of any sort MAY lead to a lot of cussing and a LOT OF LABOR ....as you try to eliminate bubbles of air. Two of the major reasons folks put on SS lines is because they think they look racy; or, they think it will fix softness in the lever, which it will if the softness or sponginess is already due to poor bleeding ....or truly bad hoses (like a blister, much more rare than you may think). If the new SS line owner now bleeds properly and thoroughly, compared to what wasn't done previously, installing SS-covered lines can greatly improve braking feel (if reduction of sponginess means anything). This does not improve actual braking power. A stock rubber hose versus a SS covered hose comparison can, even with both being brand-new, and proper bleeding on both, show just a barely slightly harder lever with the SS. That is because the SS covering tends to reduce the flexing of the rubber hose (especially with LONGER hoses) .....BUT! ... sometimes this is ALSO due to the smaller internal tubing of the SS line. This does NOT IN THE SLIGHTEST improve actual stopping power for the same amount of lever hand pressure. NOTE that having a wee bit of softness to the brake lever at its initialization point may well improve the sensitivity of the lever for you, & you may have found that a rock-hard brake lever is NOT all that easy to modulate pressure on for smooth braking. The term "woody" brakes applies here. SS lines can cause a lot of problems.
FOR MOST RIDERS ....SUDDENLY EXCEPTIONALLY VERY HARD brake lever action results in difficulty for them in modulating braking power when using brakes in turns; or, perhaps when desiring to use maximum safe braking ....that is, to power the brakes to just under where the tire might slide. SS covered hoses can have their own problems as I've noted, with failure to pass whipping tests, being more susceptible to damage from the BAD practice of hanging calipers by the hoses; and, of course, the problem I mentioned of having too small a diameter of internal tubing, and that can lead to failure of the brakes to respond in the release mode fast enough, in multiple braking situations (and increased pad wear). I ran into a quality problem myself, once, and had to send the SS hoses back to the maker for better quality ones (sidecar rig, LONG LONG front hoses, due to the type of front end).
GALFER brand is NOT recommended by me; there have been too many complaints.
Most people never have a problem with SS lines for long periods of time. However ...most stock hydraulic rubber hoses (these have internal tubes too, usually larger diameter) last 20 or 30+ years; and SS hoses DO NOT. SS covered brake lines are really very similar to 'rubber brake hoses', but the type of rubber, number of layers (if multiple), woven threads area between layers (if any), size/quality of the internal 'plastic' tubing at the center; method/quality of fastening the hose & SS braiding to the end fittings; all can vary considerably with manufacturer & model of SS braid covered hoses. Due to the inner tubing problems and generally poor life of SS braded hoses in official whipping tests, I just cannot recommend SS hoses for the average road rider ....and particularly NOT for G/S and GS type riders who really go off-road, and thus use the long suspension travel much of the time ...which can be very hard on SS-braded hoses at their end fitments.
For quite modern sport-performance bikes, where every little wee thing for improved braking is taken into account, & SS lines are standard, changing to rubber hoses, that is, no SS, will tend to show up any slight flexing. Thus, it is my opinion that if you have a bike that CAME from the FACTORY with SS covered lines, you should continue and only use the factory-made hoses; otherwise, you are on your own with installing SS braded hoses onto a bike, such as an Airhead, that did NOT come with them. Contrary to those who are in the business of selling SS braided hoses, I am of the opinion that only STOCK hoses should be used. Where the stock hoses ARE SS, the MOTORCYCLE factory KNOWS how those particular hoses are made, and has designed for such use. Do NOT be a test pilot with your brakes! While I think these things are generally true .....the motorcycle maker determines what type of hoses, brakes, etc. ...and how to use them. Often, the final decision, unfortunately, is made by their SALES department. For BMW, such was the case for the rear disc brake on the early RS/RT models. It is my belief that in SOME situations, sales departments have called for SS brake lines.
Many independent repair centers, many dealerships, etc, do not know all these things about hoses. Many have a $$ interest in selling you SS covered hoses. Many who DO know these things also know that you are not likely to wear out the stock hoses, or have problems. While I think they slough-off properly informing potential customers for these SS braid covered hoses for sake of profit (and avoiding long conversations about drawbacks), many THINK that because some bikes came with SS covered hoses, that ANY bike is helped. I also have other thoughts, perhaps better not mentioned here. Your bike is YOUR bike. What is done by you & others to YOUR BIKE, is YOUR ultimate responsibility, when you accept modifications.
3. New rotors? ....if installing new rotors, I suggest you do NOT use the old pads, even if they look like new. Failure to heed this warning can result in warped rotors and other wear ills, from what you cannot see in the surface, and below, of the old pads.
4. BMW uses different types of brake materials for various motorcycle models. It is up to you to make any decision regarding use of a different type of lining or pad material for your bike. Note cautions earlier in this article. Linings are rated by friction cold and friction hot (and other things). TWO letters are used to identify RELATIVE friction values. "FG", for instance, has a lower friction (F) cold, more friction (G) hot ...compared to some not easily identifiable standard. The higher the letter, the higher the friction value. Some pad types, particularly in the past, were not compatible with BMW discs ...but I have not seen that problem at all in recent years, probably due to more careful selection of materials for our bikes; that is, the pad makers have recommendations that are correct. GENERALLY, BMW has used only FF & FG material. HH material has very high friction. A popular lining is HH+. BMW does not use HH or HH+. It is acceptable for most folks though,& increases braking ...with no problems that I know of ....except a tendency to be a bit grabby at first (sometimes when wet, high humidity conditions), and to take longer to break-in. It is difficult to get reliable information about disc compatibility and wear from the various linings. You can try http://www.vintagebrake.com.
A LOT of misinformation is always floating around about compatibility of brake discs, pad materials, etc. Rather than get into a very long article about it ...below is most of what you might or need to know:
Do not break in new pads super-gently. That will cause chemical & physical changes at the surface and just below, and then the pads act as if glazed, which they are. Do not be too easy on the brakes! Being super-easy on the brakes is the prime reason for squealing and poor braking. NEVER install new pads with used discs withOUT cleaning the discs holes with solvent on such as tiny cotton-tipped swabs (Q-tips, etc.) AND the disc surfaces with SANDpaper, not just solvent on the surface! You WANT to remove the clear glassy, unseen coating from the old pads (and discs!). I recommend common SANDPAPER, and NOT emery paper or silicon carbide paper.
Types of pads and break-in (note that BMW motorcycle discs are not thick cast iron like most car discs, and break in should be carefully followed:
Sintered pads are made with various types of soft metals, with a bonding agent. These types of materials began being offered around the mid-1980's. They have the BEST friction coefficient & EXCELLENT wet weather performance. Usually HH type pads are of this type of construction. These pads last a long time, are quiet, & the disc will usually last the longest (which probably surprises you!). Many think that because of the metal in the pads they last long, & the disc wears fast. This is NOT AT ALL correct. I prefer these pads. HH and HH+ pads have almost no drawbacks, except maybe a tendency to grab a bit abruptly at first use, especially on some types of these pads and after overnight cooling in high humidity areas.
You MUST break them in CORRECTLY; which takes time! I suggest moderate use for SEVERAL HUNDRED MILES. After that point, you NEED to do 6 to 12 FAIRLY HARD STOPS, one soon, but not instantly after the other, from 70 mph down to ZERO. Do not try to heat the brakes to an extreme degree. Your discs are thin compared to car discs, and they are not cast iron, and they won't like excessive heat. One you do the fairly hard stops, then they are fully broken-in. Do not think that 40 mph to ZERO will do proper break-in ...it will not. These pads DO take longer to break-in than organic pads, see the next paragraph.
Bi-metal, Organic, semi-metallic, etc: Made of various types of fibers, perhaps with soft metals added. They are usually cheaper than sintered pads; give a softer, perhaps smoother (especially at first application) engagement. They break-in faster; just use them moderately for awhile.
ALL new pads require a break-in. Typically some relatively easy stops at first (not timid stops!), which matches up the pad and disc irregularities; then more aggressiveness as miles are accumulated.
Use the above noted special break-in for sintered pads. ASK the supplier or manufacturer; but you will probably find my above methods to be correct. Don't try to get the discs red hot or near it, but they will be fairly hot so don't try to touch them.
Reports of disc material NON-compatibility of normal NON-race type pads, are HIGHLY OVERSTATED.
5. There have been instances of SINGLE (only) front disc models having loose bolts where the disc assembly bolts to the wheel hub. Use 33 31 1 108204 washers on BOTH sides of the bolt and torque to 22 Nm. If it was quite loose, check the flange, etc.
6. PRE-1981 final drives use a wider brake shoe, & a narrower pivot pin. Later shoes will NOT fit correctly on older drives. You may need to remove a ridge if you substitute shoes, etc. ...that is, a late used drum on earlier drive. BMW had a bulletin about the problem, brought about by BMW discontinuing selling rear drives for pre-1981 bikes ("...use the 1981-1984 ...and these parts....").
Installing a 1981-1984 rear drum onto an earlier drum brake airhead, you need to change some parts. You will need:
1 each 25 mm shoe 34 21 1 242 403
1 each 25 mm shoe 34 21 1 242 404
1 each cam 35 21 1 454 836
4 rubber O-rings 07 11 9 906 328.
Brake shoes must fit the drum inside diameter precisely, or braking will be vastly lessened for a LONG time. That is done on a brake-arcing machine. Some BMW brake shoes do not fit the backing plate very well ...you may have to fiddle. Michael Morse at http://www.vintagebrakes.com can probably handle things for you. In instances of the arc's being very considerably different, the shoes could crack.
Brake shoes should be checked that they contact the arm CAM exactly & squarely/evenly. Earliest brake drums do not have inspection slots (for use with feeler gauges). Later brake drums usually have slots for this, but you can do a reasonable job by having the wheel off, & SLOWLY moving the brake actuating arm until the cam nearly touches, and using a THIN feeler gauge, determine that the full width of the cam contacts 100% of the metal portion of the shoe at the same time. File-down the shoe metal at the cam area to get this condition. If the shaft has too much play in its bushing, the braking will be poor ....repair that bushing area, and THEN to the filing of the brake shoe metal.
It appears that EBC and DP are simply rebranding the actual maker, which is Ferodo. BMW shoes work fine, but may need a bit of reworking to fit correctly, SAME for other brands.
Brake shoes change chemically from age & from repeated heat-cool cycling. If your brakes are awful, start with new fresh high friction linings on well-cleaned (after sandpapered) drums. BE SURE the shoes fit the drum arc, use a feeler gauge if unsure. Brake shoes may need break-in to be different than brake pads, ask about break-in technique for YOUR new shoes.
7. Caliper rebuilding hints:
Somewhat POLISH the pistons outside diameter. If the piston is badly pitted it MUST be replaced.
BMW does not supply everything in the rebuilding kit you may want, and other companies WILL supply such. SOME calipers can NOT be properly rebuilt without the halves being separated; primarily because the pistons can NOT otherwise be removed. Some calipers, such as many Brembo types, can be rebuilt withOUT separating the halves; and, separating the halves may be a BAD idea.....you may not be able to find the O-ring between the halves, and, the torque on the bolts distorts the halves, and you may have to surface halves to get good sealing! Best NOT to separate the halves UNLESS YOU HAVE TO!
Assuming you ARE going to separate the halves:
For BREMBO (some of this is applicable to ATE): Slightly loosen the caliper halves joining bolts before removing the caliper from the motorcycle because calipers are hard to hold in a vise & it will prevent scratching, etc., the calipers.
Use compressed air to CAREFULLY unseat the pistons toward one another before separating the caliper. I place a thin piece of metal or wood between the pistons, to keep them from flying out (or coming out much at all). Then remove that piece and use a bit of air to finish removing the pistons, while covering the piston with a rag.
Problems with resealing the halves after reassembly may also happen because the originally assembled caliper bolts were tightened so much that the aluminum caliper halves distorted slightly (not all will distort from proper torque, but some will!). The area around the holes for the bolts holding the calipers together will warp slightly, you cannot see it, but it happens, and the re-assembled caliper would weep fluid if you did not do what is necessary first. Separated halves ALSO might never join up again in exactly the same position; high and low spots don't match exactly, and thus leakage can occur that way too. The fix is to resurface the halves on a surface plate with some 1000 grit Wet-or-Dry paper, using wetted paper, water is OK. You can start with slightly coarser paper. It is quite important that you keep the halves absolutely square and even ...as the slightest irregularity can cause sealing problems. Best to use only brake fluid for final cleaning of the halves before reassembly, then wiping down with a lint-free cloth. If you use other stronger liquids as solvents for cleaning, be sure you flush them away with brake fluid before reassembly. AVOID hydrocarbon solvents other than brake cleaners. I usually use a kitchen dish washing detergent with water, then rinse, and a final cleaning with spray brake cleaner OR brake fluid.
The rebuild kit MAY contain an envelope of "brake assembly grease". This is for the piston seal & caliper bores. Use sparingly. I use brake fluid as the lubricant on re-assembly of all calipers. If you have problems, try the silicon brake assembly grease. Sometimes the pistons are devils to install. Be extra careful that the caliper groove is totally cleaned & that the piston is smooth at the edges and the O.D. is polished, all this before beginning. Some auto parts stores carry the brake assembly grease if it did not come with your brake repair kit. Lubricate the new square ring on the piston on all sides before assembly. Threads should be clean & then lightly lubricated with brake fluid. Torque the bolts EVENLY on the caliper to 22 foot-pounds (Brembo). Once all is assembled & caliper installed & system bled, finish the job by washing off hydraulic fluid drips from the caliper with plain water. The caliper should NOT LEAK IN THE SLIGHTEST in use.
Some Brembo caliper rebuilding kits do not come with the small inside O-ring. You need a 6 x 10 x 2 mm O-ring made of EPDM rubber. BE SURE it is replaced if you open the caliper. DO NOT USE HYDROCARBON SOLVENTS on the rubber parts, not even briefly!
The 31 11 1 454 809 repair kit for the ATE NON-SWINGING calipers, as used on early R45 and R65 bikes, do NOT contain the small square-sectioned O-ring that you will need IF you separate the halves. The part is NOT available from BMW. A usable O-ring, of proper EPDM material, is available from McMaster-Carr. It is #AS568A Dash Number107; and is part number 9557K72. You will have to purchase a box of 100, but the price is quite reasonable, so share with others.
8. For those with the master cylinder on the bars, if you are replacing a 15 mm size, which is 32 72 2 302 370; you can consider, for somewhat more powerful braking, the 14 mm size, which is 32 72 2 310 785. This type of recommendation works with most master cylinder sizes. Watch out for excessive lever movement. I am NOT responsible if you have a problem. This reduction in size MAY work if you are ADDING a caliper; but less likely if increasing caliper piston area very considerably.
9. Rebuilding master cylinders:
Sometimes it is not cost effective. You can consider, carefully, the rebuilding of them yourself; but, you might want to check with EuroTech for parts. Below are some other sources.Ted Porter at www.Beemershop.com for anything having to do with the brakes, including re-sleeving, etc.
https://bmwmotorcycletech.info/references.htm under B (brakes)
There are places that can resleeve/overhaul master cylinders (these are the only names I have collected so far):
Ted Porter at www.beemershop.com
http://www.whitepost.com/
http://www.karpspb.com/
www.applehydraulics.com
http://applehydraulics.com/motorcycles.htm
http://www.cycleworks.net
http://www.autosportseattle.com/
S A Master Sleeves Brake Repair, 33 Main Rd, Wynberg, Capetown, So. Africa 2721 761 6962
10. Some R45 and R65 models with TWIN front discs have, from the factory, the RIGHT side caliper wrongly spaced/aligned to the disc. Spacing sleeves were available. YOU MAY NOT find these numbers in USA fiche:
1.2 mm 34 11 1 238 079
2.35 mm 34 11 1 238 080
3.5 mm 34 11 1 238 081
If you use any of these sleeves, change the caliper bolts from M10 x 25 to M10 x 30, 07 11 9 913 839.
The first braking modifications I did were on my Model A Ford. Next one, much more extensive, was on my hotrod 49 Ford, where I converted from drums to discs, at the front. A lot of work. Since that time, I have done a LOT of brake modifications work, ...from some of my cars/trucks .....to motorcycles, ... 90% of those were 'braking improvements', done specifically so that a given amount of hand or foot effort would stop the bike better, yet remain well-CONTROLLABLE. By CONTROLLABLE I mean that the brake lever did NOT become 'touchy', it felt good in modulating the hand or foot pressure. You SHOULD NOT want a brake that is 'touchy', as that would mean it is too hard to modulate; especially if the road is slippery. THE criteria for braking lever feel is NOT just a hard lever. A too hard lever "wooden feeling" can be very difficult for many riders to modulate the braking pressure under some conditions.
On a motorcycle, there is the usual master cylinder bore size change that can be done, often by just selecting the correct year and model, quite often there is no need for going to special mountings for other MC, etc. There are also plenty of aftermarket MC/lever assemblies, many are adjustable for lever distance, a NICE feature, particularly for smaller hands. They may or may not be difficult to install. It is vastly easier to just remove the stock lever and file the actuating nub of the lever a bit. I suggest adding a quite weak spring or, fashioning a nice adjustable stop screw, to eliminate lever vibration and lever free play. Done neatly, this is a cheap yet nice way to get the lever back some to fit your hand.
A factor on a bike is the pivot point leverage. That USUALLY is not changeable hardly at all unless the entire assembly is changed to some other bike's or aftermarket equipment. That pivot point leverage controls a lot of the FEEL, besides stopping power for given hand pressure; and, also has a goodly effect on lever movement. Some racing bikes & even road bikes levers can be set to control how far the lever moves before the brakes bite at all, most often they simply adjust the RESTING position of the lever, not exactly the same thing, but often OK. For BMW Airhead motorcycles, I suggest you don't bother trying to change the pivot point, but as noted in the paragraph above, there are ways to make the lever fit your hand better.
Because of pivot placement effect, as much as 2 mm of front MC size change can mean NOTHING between assemblies, maybe more, for the SAME MC bore size. BMW standardized for leverage position ....but there IS a noticeable difference between the ATE under-tank MC and the on-bars MC, so be very cautious about changing to larger piston sizes. I have already suggested that you try using original MC piston sizes first, when adding discs, etc. Same or less size even!, is to be considered when just changing a MC due to the old one being beyond repair ...even when not adding a disc!
More references:
http://www.vintagebrake.com/mastercylinder.htm This is their information chart on MC & caliper combinations. I'm not in full agreement, and suggest you use MY information in this article you are reading!
http://www.airheart-brakes.com/pdfs/MasterCylinder_Selection.pdf
When reading any of the above website's information, pay attention to the effect that lever (or pedal!) pivot point ratios can make. There is obviously a LOT involved in obtaining not just adequate or superior braking, but obtaining a FEEL TO THE LEVER that is acceptable or superior. I suggest you pay attention to MY ADVICE, given earlier: that I think you should TRY your old master cylinder size FIRST (be SURE bleeding is perfect!). Your stock MC is likely going to be OK; and better than those various charts seem to suggest!
For the BMW Airheads, 1970-1995, it is reasonably easy to convert the brakes to almost whatever you want, with ONE exception. That is the ATE swinging calipers which use special fork lowers. This CAN be gotten around, withOUT changing the lowers to Brembo types, but often is messy, due to the lack of more appropriate mounting points. One can install the R90S dual discs, but that does not generally give great-brakes, just better brakes. One method of doing this to allow other calipers, that I have not yet tried, is to weld mounting tabs.
I did one particular job for a customer who insisted he wanted outrageous brakes, & did not care (?) if they were 'a bit touchy'. I ended up installing a second front disc; then, I modified 6 spot Harrison calipers for each of the now two front discs. For the rear, he also wanted a disc brake, although the drum brake he had was better, in my opinion. So, to get a bit better rear disc performance, I used a large diameter rear disc with dual spot paired caliper. Couldn't go too far, with the stock leverage of pedal to master cylinder. All the brakes could easily overpower the tires. It was overkill, by a bunch. He had to sign a waiver!
A common BMW upgrade is going from one front disc to two; sometimes installing aftermarket floating discs. While popular, & BMW offered kits for the second disc & caliper, that does increase the UNsprung weight, and therefore the HANDLING of the bike WILL deteriorate SOME. Whether or not someone is sensitive enough or not to feel the handling difference is a good question, often they do NOT; mostly because they are simply after stronger stopping brakes, and likely are not seriously the hardest-charging riders, at least not in turns or rough roads. Where it matters is over things varying between small irregularities such as tar strips to much rougher roads in cornering. That is the SAME area of handling ...that excessive STICTION in the FORKS ....is so concerned with. With high stiction due to misaligned or bent/twisted forks, or improper use of a fork brace, you have a double whammy on handling. Some have these handling problems and make it WORSE by some wrong thinking ...by using HEAVIER WEIGHT OIL in the forks! However, properly set up minimum stiction, etc., handling does not suffer much. In MY opinion, the best compromise on is single disc and 4 or 6 spot caliper.
Changing brake linings to HH+ types can add as much as a third the EXTRA stopping power of one disc. TWO discs with HH+ are not enough braking, however, for some folks. Just changing pad types, or adding another disc, or both, may not be dramatic enough of a change for some riders. Thus, we have the use of later model motorcycle's (such as Oilhead, K bike, etc.) brakes, and sometimes even aftermarket brakes, grafted onto Airheads.
Brake considerations for sidecar rigs:
A sidecar itself brake requirement (if you intend to have a sidecar brake) is ....or can be ....very different from a front or rear brake installation and operational requirements of a motorcycle. It is additionally quite different if using a drum brake versus a disc. In general, the sidecar brake is almost always purposely designed to NOT be very powerful. After all, the sidecar itself has mass and momentum (Inertia) when the rig is moving, and the sidecar is very considerably offset from the tug, thus even a SMALL braking force on the sidecar is enough to cause the rig to TURN, and the more braking force the more the driver will have to steer in the opposite direction, and that tends to use up the traction of the tug's front tire.
Mechanical drum brakes come in two basic types. One type has a dual-leading shoe ...which is, usually, much more powerful, and not usually needed, nor desired, for a sidecar. Drum brakes with hydraulic cylinders are single and dual operating, and some also operate with a leading shoe. All sorts of variations. Sidecar rigs are often fashioned with no brake at all, and many have put very high mileage, indeed on a brakeless (sidecar that is) rig. For those with a sidecar with a brake, it might be a disc brake, drum brake, and may be hydraulic or mechanically actuated and may be connected in various ways to the motorcycle (called the TUG). For those questioning the wordage here, yes, there are NON hydraulic disc brakes. I have actually seen a light weight sidecar rig with a BICYCLE disc brake, and it worked fine! All these AND MORE considerations are why 'charts' have to be used with experience and a fair amount of knowledge, and may often be totally ignored! Of all the variety of motorcycle-based vehicles (including trikes and sidecars..) the true sidecar rig often has the most ingenuous & clever ...not to mention STRANGE and innovative contraptions (OK, ideas, things, methods.....).
I have designed and built a few racing and street and off-road sidecar rigs. I have worked on many. A variety of brakes were used. I did my own version of a 100% mechanical brake on the sidecar on my R100RT-Ural rig. I REALLY liked how that worked out. I used two pedals (details, photos, on this website) with a simple design that allowed just the right amount of progressive braking, withOUT a hydraulic tie-in to the tug's systems. EITHER brake pedal could apply the tug's Ural drum brake. Only the original tug pedal could apply the rear tug AND sidecar brake at the same time. I was pretty proud of myself when I figured out how stupidly simple (in theory) it was to do progressive but limited sidecar braking ....and this was with great brakes too .... if the design was done really right. So, what about that word LIMITED?....you glossed over that, eh? I mechanically made it so braking beyond a certain point for the hack was not possible; an increased safety item; yet, I could rotate the entire rig in a tight circular movement, even a full circle if I wanted to. The advantage was a good one, and also greatly reduced the effort (my shoulder and arm effort especially) in making sharp right turns.
I have also done hydraulic separate pedal systems (besides single stock pedal for rear brake). Usually have and added pedal right next to the tug's rear brake, close enough to manipulate both with one's foot WHEN that was desired. Selection of added master cylinder sizes is either somewhat critical, or not at all, depending on leverage-mechanicals. Some sidecarists have used tie-ins to the bike's braking system(s) with proportioning valves to the chair's brake. In general, you do NOT want powerful sidecar brakes, but DO want powerful TUG brakes. No end to braking ideas.
Really is a LOT of possibilities, & even electric brakes have been used. I helped on one of those. Was tricky, but I had a background on bike trailers and the problems using electrics on very light vehicles.
Complications can arise, & decisions need to be made, about installing a braking system on a sidecar where the tug has some sort of Integrated Brakes, as on some Honda's, and others. ABS is another big question. Many just leave the ABS system in place, and it has worked OK for rigs with and without brakes on the sidecar, and with brakes tied into the tug's system (often trickier to do). I personally dislike ABS on a sidecar rig, but that is due to my driving style. For ME and MY sidecar, the reason to NOT have ABS is because, like most experienced but sometimes aggressive sidecar rig drivers, we sometimes purposely skid the rear (tug) wheel, in cornering ...the ABS will upset that purposely skidding if you are using the proper technique, which includes holding a light amount of front brake in that turn. It is not a big deal, over-all, but just another consideration. Disabling ABS is usually fairly simple, but on my K1100LT sidecar rig, I totally removed all that very heavy ABS stuff.
Most do not seem to initially consider that a powerful sidecar brake is not only not needed, but it can be a big detriment. It is ticklish to 'tone down' an existing powerful brake in many circumstances. A sidecar brake that can be easily locked-up can be very dangerous.
IMO! ....The only things that a sidecar brake is nice for is:
a. Help stop in a straight line without jerking, without excessive steering input, especially in panic mode.
b. A sidecar wheel brake can make the turning radius of the rig VERY tight, essentially pivoting on the sidecar wheel (in turns towards the hack).
c. Certain very brisk movements for the more aggressive drivers.
For various reasons, I often prefer a SMALL disc brake on a sidecar rig. One pedal or two, tie in to the tug's rear braking system or not, all no big preference. For some rigs, a mechanical sidecar brake works VERY well, indeed!
I've been asked now and then where to go for brake hardware, adaptors, gaskets, fittings, banjo bolts, tubing, etc. One supplier is Brakequip.com.
Some final thoughts....
Human beings do not have a lot of fore-aft flexibility nor high pressure ability in their feet in pushing downwards forwards of the ankle. It is just how we are constructed. FEW of you probably do exercises to improve that function ...such as toe stands and leaning backwards and then bending the foot forward.
To accommodate humans, most rear brakes on motorcycles have a limited maximum pedal travel from no brake, pedal at rest, to full brake. Where adjustments are available, they should be done correctly. Airheads, both disc and drum braked, have rear brake pedal adjustments.
After proper adjustment, sit in normal riding position on your motorcycle (on its center-stand), and put your right foot onto the footrest & the rear brake lever (lightly touching, not moving, that lever). Move your foot and see what angle your foot can actually reach, as you are pressing the pedal. It is fairly small, overall, compared to the movement your fingers/hand can do at the bars lever.
For most of us the pedal has a limited possible movement, in accordance with human anatomy, which leads to a quite different ratio of master cylinder to brake cylinder ratio. The calculations can be fun, since one must consider the brake lever pivot and lengths measurements. Just one of the reasons various leverage charts are NOT usually accurate for us, whether or not we are on a 2-wheeler or a sidecar rig, and this is especially so for the rear brake.
On FRONT brakes, as I have noted in this article, it is often perfectly OK, and even better on some bikes, models, years, to use the original master cylinder when adding, perhaps, a second disc to the front or changing a single spot caliper to a dual pot caliper on a one disc bike.
There are only a limited number of rear brake master cylinder sizes, usually just 3, see Maguro literature.
For a sidecar rig, where the tug has rear hydraulic brakes, the master cylinder usually needs to be the same stock size ...OR ...a mm larger, when you add a sidecar hydraulic brake. Experience counts.
BUT: You do NOT want too much brake on the sidecar. Some add proportioning valves. I have managed to avoid that complication by using my own methods!
MISCL. notes:
1. The rear brake cam has a D shaped washer....the flat faces up.
2. Orient the drum brake cam so that the leading shoe (upper shoe) contacts first.
3. The very earliest rear drums did not have inspection slots. The inspection slots probably started around 1971 or maybe a year or two later. Use those slots with a feeler gauge. You can check the shoe-to-drum clearance at several places around the shoe. It will commonly be found that the leading edge of the shoe has more clearance.
� Copyright 2024, R. Fleischer Return to Technical Articles List Page
Last check/edit:
Friday, June 07, 2024