
|
|
The ads above are Google-sponsored;
clicking on them at every visit helps support this website!
Clicking on something inside an advertisement helps even more!!
THANKS!!
(AND.....thanks for the donations...
https://bmwmotorcycletech.info/donating.htm
Clutch:
Adjustment of clutch levers; replacing bushing in bars lever.
Fixing potential cable breakage...& new cable problems.
Lubrication of clutch splines (input splines of transmission).
Preventing broken ears at transmission clutch lever.
Clutch carrier/flywheel, bolts, crankshaft end play.
Disassembly and assembly.
Throw-out bearing & pushrod.
Crankshaft end play spacers.
1981 Clutch/carrier problems.
STUCK CLUTCH.
SLIPPING CLUTCH.
© Copyright 2024, R. Fleischer https://bmwmotorcycletech.info/clutch.htm Article 60, subsection 9
Warning! Warning!! WARNING!!! Under no circumstance should the flywheel or clutch carrier, on any Airhead model be removed without first blocking the crankshaft! https://bmwmotorcycletech.info/flywheelremovalwarning.htm
Block the crankshaft! Do not take a chance on serious damage to the engine!
Many have removed & replaced an Airhead flywheel or clutch carrier without blocking the crankshaft with no problems. My advice, very strongly given here, is to take a modest amount of time & make & use at least my simple crankshaft blocking tool. If you do not use some sort of crankshaft blocking tool, & your crankshaft should happen to move forward enough (does not take much pressure nor does it have to move far!) to have one or both of the thrust washers fall off their pins, you could cause very serious damage as you attach & bolt-up the flywheel or clutch carrier. Even if you do not cause serious damage, if the forward thrust washer drops, you may be unable to get it back on its pins without a very considerable amount of work. Do not take a chance!
Since it is a must, in my opinion, to mechanically block the crankshaft from moving forward at any time during the process of removing or replacing a flywheel (or clutch carrier as it is called on 1981+ including some 1980 models), you need to know how to best do that.
This can be done in several ways. I recommend you do not use 'a towel' between the front cover & the alternator rotor, as is sometimes done. I recommend a simple & neat method ...just make a tool out of a piece of Allen wrench material, weld a disc (fender washer) on one end, making the length such that the Allen end fits into the alternator bolt, & the disc end presses against the inside of the outer timing chest cover. Usually 3/4 inch overall. The length should be such that there will be some light pressure applied by the cover to the tool, the cover being screwed back towards the engine lightly. The length of the tool should be long enough that the outer cover does not touch the engine case. Resaid: the tool should be just long enough that the cover can not be fit fully home all the way. Obviously you don't want to tighten the outer cover very much & you do not need to! You can, if you want, eliminate the welding and washer, by grinding the outer end of the allen wrench piece a bit rounded, then smooth it some.
A further treatment of how to make my tool, & a photo of it, is in https://bmwmotorcycletech.info/tools.htm , as item #8A. If you do not have a welder, or do not wish to have the tool made with a washer, as noted, you can just use a piece of allen wrench. YOU CAN ALSO USE SOMETHING THAT DOES NOT ENGAGE THE ALLEN BOLT IN THE ALTERNATOR ROTOR...JUST A ROUND PIECE OF SMALL DIAMETER MATERIAL. The tools article also has photos of the clutch disassembly & assembly tools ...you may need three if you have an early model; although three common bolts work well.
At this point I strongly suggest you go look at: https://bmwmotorcycletech.info/flywheelremovalwarning.htm >>>>SEE and READ IT<<<<
Whatever tool you use, be sure it cannot rotate such as to loosen its pressure on the inside of the outer cover if you rotate the flywheel in either direction. Pre-positioning for the OT mark will usually eliminate that potential problem. The advantage of my tool is that it is unlikely to allow the alternator bolt to loosen if the tool is made and installed correctly, as you rotate the flywheel. Be sure the tool is not 'captured' by raised grooves on the inside of the cover, etc. Think!
Be sure the OT mark is in the timing window when removing & replacing the flywheel (or clutch carrier). I suggest you do this "removing & replacing" only when the pistons are fully extended outwards. Many a person has made the mistake of mounting the flywheel (clutch carrier) to the wrong bolt holes! The flywheel is not 'indexed' & can be installed to the wrong crankshaft holes. The flywheel is also to be centered in the proper selected holes, by moving it back & forth very slightly CW-CCW, with its bolts a fraction of a turn loose, before being fully tightened. This sets the flywheel (clutch carrier) so it is properly centered on the bolts. Tighten lightly, & then torque to specifications.
If you are removing the flywheel for such as installing a new mainseal or oil pump cover seal:
I RECOMMEND YOU SET THE OT MARK IN THE TIMING WINDOW BEFORE YOU LOOSEN FLYWHEEL BOLTS; BETTER YET, BE SURE THAT THE OT MARK, WHEN CENTERED, REALLY IS TRUE TDC; THEN INSTALL A CRANKSHAFT MECHANICAL STOP; THEN, AND ONLY THEN, IS IT 100% SAFE TO REMOVE THE FLYWHEEL (LATER MODELS CALLED CLUTCH CARRIER).
Clutch parts, including flywheel or carrier, should be identified by marking with paint or punch pricks before you disassemble. BMW did that on some models. If you see factory marks, those marks are to be oriented so they are, as best possible, 120° apart to each other; that is, they are NOT lined up! BMW marks may exist & may not. This is contrary to what the repair industry usually does, which is to align marks. I use one punch prick opposite another for the first marking; the next set, if needed, is two punch pricks, then three, etc. Arrows also work. Those are standard methods. I don't use paint or other marking methods. The need for marking the clutch parts varies between pre-1981, and from 1981; best to just mark them all and not have to remember.
NOTE: When installing a clutch (bolted parts), I suggest you set up a dial indicator, mounted to the engine case, and if there is any runout on the outer edge of the various parts, see if you can adjust the parts, such as the pressure plate, by loosening the bolts a bit, and prying carefully to center things better. This can reduce engine vibration.
/5 clutches had changes during production. The replacement diaphragm springs were changed, & the 6 spacers were no longer used.
Spacers are sometimes added if parts have been resurfaced and are thus thinner.
There were several types of diaphragm springs used, & the heavy duty type is usually stamped with the part number. That part was 21-21-1-234-035. Some call that the 'sport plate' ...but it is the diaphragm spring.
There was a spring common to the R90/6 and R90S, 21-21-1-231-842; it is obsolete, NLA.
The pressure ring was updated, that is part of the spacer deletion mentioned above, & the new pressure ring is more rugged, & a better heat sink. If you are updating, the updated parts are the -035 spring; the 21-21-1-236-332 clutch plate which has an extra set of rivets & a plate, on opposite side, locks those.
Another later part to use is the 21-21-1-231-666 pressure ring. The early pressure ring had standard blade screws which should not be used; instead use 6 point head Allen screws; torque to a target of 16.6 foot-pounds.
|
BMW made major changes to the clutch/flywheel parts in 1980 (in some instances, this did not happen until 1982). In general, the changeover occurred with the 1981 models. The "flywheel" was eliminated, & a lighter 'clutch carrier' design was used. The throwout bearing was also changed in design. These changes resulted in new parts that are very different from earlier models. The new clutch assembly is considerably lighter & requires much less force at the handlebar lever. Engine vibration generally increased due to the lighter flywheel. 1981 only clutch parts were troublesome, & there have been some nasty failures. There were some soft splines on these clutch discs, causing failure of transmission input shaft splines. The initial clutch friction disc, called officially the clutch plate, was 21-21-1-242-370. They had a tendency to break. A stronger disc, under part number 21-21-1-451-512 was then used. The carrier, officially the clutch housing (or, clutch case), was 21-21-1-242-372; it was also beefed up, becoming 21-21-1-451-511, which became 21-21-1-338-722. During early production of the 1981 bikes, some bikes had factory installed washers between the carrier & cover. Those are NOT to be used when replacing these parts. The early carriers had 6 'ears'; later ones went full circle....so did not twist & distort nearly as much. I had a machinist make a multi-part plate/hug/mount to check alignment of the input shaft bearing bores relative to the mounting points on the gearbox case where they mate to the engine. I was given ALL of the returned housings from dealers to check. Oak consulted on this project. I didn’t know Snowbum yet at that point (1981-2). We never found a single case that was mid-manufactured to have misalignment of the input shaft bores, nor did we find any manufacturing defect that would explain repeated spline failures. The failures definitely WERE happening, we saw many failed clutch plates and input shaft splines. My thought is that the actual Clutch plate was made of too-thin steel, and I think that the plate would flex under load, causing the spline wear. When BMW got an upgrade on the clutches, one of the upgrades was a thicker steel plate for the clutch. Those didn’t tear out the splines. Tom Cutter
The 1981-1984 diaphragm spring was 21-21-1-242-353. I suggest you use the higher pressure version 21-21-1-338-508. The pressure plate 21-21-1-242-354 became 21-21-1-243-009, which became 21-21-2-302-200. The rearmost part, called a case lid or housing cover, was 21-21-242-355; & became 21-21-1-457-280. Bolts 21-21-1-242-371 became 21-21-1-338-680. If you are overhauling a 1981 model with original parts, it is a VERY good idea to replace all the parts that were later updated ...which is nearly everything! |
New discs are ~6 mm thick. When worn below the official limit, 4.5 mm, they may slip. Slipping tends to show up first when using large amounts of power in top gear. If the rest of the clutch parts are in reasonable condition slippage may not occur until ~3.5 mm. No hard & fast rule here, due to wear (cupping on the pressure plate, wear on the diaphragm, friction material, etc).
I check clutch parts on a machinist's flat, but you can use a flat piece of glass, etc. I use feeler gauges and other methods to determine the dishing, etc. Check disc thickness via vernier caliper or micrometer. Another way, very commonly done to determine if the parts (besides the friction disc) may need resurfacing or replacement, is to measure the width of the worn disc of the friction material (both sides together), near the outside edge, & near the center. If thickness is considerably different, then all the friction parts of the clutch need attention. While there is no directly official specification, you could determine it from how BMW shows the various distances, etc...and find that to be ~0.3mm ...disregard that, and use my ~0.5 mm. Check the diaphragm spring with vernier for height, etc. See the specifications in the various literature. The diaphragm spring has specifications, vary with model as to height & as-fitted pressure & when pressed flat. There is also a specification for the height differences of the spring fingers. Ask about these on the Airheads LIST. For the spring, I suggest that only the un-pressured height usually needs be checked (besides inspecting for unusual wear).
If you replace just a friction disc & the mating parts are worn enough (especially if they are not flat or flat enough) the clutch may slip ...although if used gently, the clutch may break-in after a few hundred miles & then be OK. Using gently here means not letting the clutch slip much, which will happen if you use high throttle and top gear until broken-in. Professional mechanics usually do a clutch job by replacing the three $$$ parts, but you CAN just replace the disc, but I would recommend checking the taper/flatness of the parts. The heavy duty higher pressure spring is a good idea, especially with these later non-asbestos discs on the early clutches.
Most clutch parts can be overhauled. Southland Clutch modifies old parts & supplies a thicker disc (as needed with their machining of the originals, etc. https://bmwmotorcycletech.info/references.htm under C for clutch....or, see much later in this article, below, for their information.
Disassembling the clutch:
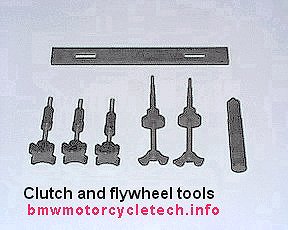
Clutch bolts on early clutches (non-clutch carrier types) are not long enough to remove them without a spring-loaded problem from the clutch. It is important to unfasten the early clutch bolts evenly, in a criss-cross fashion. So, how to do it? You first remove three, alternately spaced, of the six. In place of those three, you install three longer bolts & spacers from the hardware
store ...unless you have the BMW factory-type clutch tools; or, tools from some aftermarket maker. Using either the hardware store bolt method or the factory or aftermarket tools, you can now undo the other bolts, evenly, in a criss-cross pattern, bit by bit. I reuse the early models bolts (I inspect them of course). Here is a photo of the factory-type tools for the early clutch (including the centering tool): https://bmwmotorcycletech.info/ClutchFlywheelTools.jpg
See also: https://bmwmotorcycletech.info/CLUTCH-TOOL.pdf
On the 1981+ clutches (clutch carrier type of clutch), you should use new bolts and use new special vibration-proof washers. On the 1981+ clutches, there is no need for the use of special bolts or tools, you simply remove the original bolts. Note that these clutches can stick from corrosion at the bolting areas. Use a small flat blade tool, even a screwdriver; gently pry a bit here, a bit there, & over a few minutes the clutch will come apart.
An SI was issued with a lot more information on where to grease the mating clutch parts ...ETC. That is in the 1992 service fiche, page 4, G13/H13/I13. Basically, it is the contact points of the diaphragm spring. I use a moly grease there, very sparingly.
HINTS :
Exceptionally stiff clutch action can be due to a bad or wrongly routed cable. It can also be caused by a worn, grungy or failing bearing & even broken parts in the clutch throwout bearing area, including the bearing, piston, etc. Do not fail to change the clutch cable if it is bad; it can feel OK with the cable disconnected at the transmission end, yet be very stiff when in actual operation. Do not install the clutch cable running with sharp bends; nor have more than one zip tie on the right down-tube. Be sure to grease the bar lever clutch cable
barrel-end & barrel itself area (moly!). Be sure that the cable inner strands are not fouled by the slot in the bar lever as you pull the lever back towards the bars or move the lever up and down. Yes, that means to also wiggle the lever angularly up and down to see if there is so much play in the lever bushing (nylon & replaceable) that some strands foul in the lever slot. It is especially important that the cable end, including its cable barrel, be free to rotate in the clutch lever. The crimped area at the barrel end must not foul the lever either, & you might have to file that a bit. Pulling the clutch lever slowly backwards will show by #1 eyeball if the barrel is moving freely. If not,
unfasten the cable from the lever, & clean up any rough spots on the barrel, then re-reinstall, again using a moly grease on the barrel.
Some clutch cables are poorly made and sold by BMW ...so do check the clutch cable ends very carefully for appearance and that operation in the lever is proper.
The clutch cable condition is exceptionally important, due to the heavy pressures/forces on it. Be sure the clutch lever pivot (lightly pressed into the clutch lever itself) is not excessively worn ....if worn, the clutch lever can angularly move in a direction that allows the steel cable strands to rub on part of the clutch lever, and strands will eventually break. The pivot is a plastic sleeve that is easily removed and replaced, but may need SLIGHT enlarging for the steel pin to fit it properly (it must be able to rotate)...but, minimum free play with good rotation is the goal. Be sure the metal cable barrel is lubricated and rotates easily, if not, do some hand filing. SAME for the barrel of the clutch cable and lever, located at the backside of the transmission. I OFTEN find the transmission clutch LEVER "half-round" in need of very light filing.... LUBE IT too.
If the lever nylon bushing needs replacement, do so. If that bushing wears too much, the lever will angularly cut the cable. Heat the lever if the new bushing does not push right in. If the new bushing does not fit the pin properly, then ream it slightly. Don't own a tapered 8 mm ream? You can use progressively larger (by a thousandth or three) drill bits ...just do not remove too much material! There is a waverly washer used in a machined depression in the clutch lever, it must be there.
The curved area for the barrel (at the lever at the rear of the transmission) may need filing to enlarge the curve very slightly, so the barrel will easily rotate. That is very common. More on that in next paragraph. For more information on cables and levers, etc:
https://bmwmotorcycletech.info/controlcables.htm
1. Inspect the cable barrel. It must be smooth & round. If not, file it so, finishing with fine sandpaper. Be sure that this cable barrel can rotate smoothly in the clutch lever fork. If not, use very fine sandpaper, or? and polish the rotating area & very slightly enlarge the opening in the lever, so the half-round area is a bit bigger. I give a slight bias to the main body of the lever, rather than the tip. Clean up any sharp edges; & then use fine sandpaper on any convenient round object, such as a screwdriver shank, to smooth the area. Having a lever and barrel that work smoothly together will greatly extend clutch cable life.
2. Clean up the lever slot with sandpaper, so there are no sharp edges. This ensures that even if the nylon bushing in the lever wears considerably, the cable inner strands will not excessively rub the original sharp-edged lever slot.
3. Check how the cable barrel rotates, in the arm, it must rotate smoothly. Lubricate it with moly grease.Throwout bearing, etc:
Slipping clutch? STIFF or no clutch or slipping clutch ...when engine fully heated up (or even when cold)?
This problem originally was originally reported now and then only with motorcycles manufactured to, perhaps, as late as the early 1990's. It is now clear that the problem exists, even if rarely, on even the last of the Airheads, such as the R100R, & even with the "new" throwout bearing assembly that BMW went to well before. This section has been revised several times as new information has become available.
On 1980/1981 & later models, the PLASTIC (which looks like aluminum) or ALUMINUM 'piston' (yes, both types were made) with the metal center, that the clutch lever at the back of the transmission applies its force to, might be too large in diameter & stick in the transmission bore when the transmission is hot. This piston is located next to the 1 inch mark of the ruler in the photo well-below. The LIMIT is 28.7 mm, & it can be sanded down, or replaced. Tom Cutter has reported that BMW has made updated throwout bearings, see the -167 number quite a few paragraphs below, that were both good, AND BAD. The original problem occurred because of accumulated error tolerances on some transmissions throw-out area bore sizes, & similarly with these throw-out pistons. I believe that the plastic ones also may age, expanding over time/miles. If the piston fits into the bore a bit too tightly .... & it may still operate fine when cold, then, under some circumstances, particularly when hot,the piston may stick. That is because the piston material expands very considerably faster than the aluminum bore it fits into. Obviously this means that the best check is with a hot transmission.
The problem can manifest itself in several ways, including a hung-up or very stiff operating clutch, or as a slipping clutch.
Measure the piston, & if it is over 1.13" (28.7 mm) when hot, you may want to reduce the outside diameter a bit. I have seen these as large as about 1.142" that still worked OK (not all at that diameter will be OK). It depends on the transmission bore hole, but you won't be changing that. You may be better off with modifying your original piston, rather than take a chance on BMW's 'new' piston....granted it is now a one-piece assembly. I just do not see any big advantage to the new design.
As a general rule, it appears that if the piston has a diameter of 1.122" (28.5); it will work in all the transmissions.
I can't give a hard & fast rule here, but if your throw-out piston is up to 1.141 or so, I would certainly see how it fits, & if a bit too much friction when it is hot, I would recommend sanding the OD a bit; keeping it concentric! You might want to check the fit, hot, if you have any hot clutch slipping problems or any stiffening or hung clutch problems, but OK when cold. There have been some reports that the plastic piston expansion can happen & then be more or less permanent; after years of seemingly being OK. I think the 'permanent' expansion, if that happens, is likely to be occurring almost from brand-new, & that it might take a very long time & many miles, for the expansion to reach the grabbing-seizing point. No proof of that.
More Details:
BMW has had several versions of the throw-out parts, & offers a replacement piston 23-13-1-464-167, which is another way, if somewhat
costly, of coping with a sticky hot piston. If your old bearing is quite bad, & piston sticking when hot ( UNfortunately, some of the new assemblies are faulty) ....you could consider the new part, as it is a new design, incorporating the bearing, & it supposedly has the proper
diameter. If your old items are in good condition, you do not have to spend the money, ....you can sand your piston outside diameter. It has been said that there is a special surface coating on the piston, & sanding or otherwise machining is a bad idea ...This is not true, sanding works fine, & lasts. Just do NOT remove way too much material, or the piston could cant sideways. It is unlikely that you will remove too much material, as sanding the plastic takes time and only narrows a wee bit with a fair amount of effort. Measure it, during sanding, of course!
NOTE that new-style (-167) pistons have been reported as expanding & sticking! I've received reports that new-style pistons expanded slightly & permanently, & also gave clutch problems with the transmission being cold! I personally have not seen this (yet) ...& probably will not, since I have stopped doing work for others. It has also been reported to me that BMW MAY have recently shipped all-plastic parts that have the same old problems!
It was reported in May 2013 that a R100R with original "new type" piston assembly was seizing, & was repaired by slightly reducing the piston diameter. That was the first instance I'd heard of this on a R100R. The R100R was the last version of the Airheads, sold into 1996. Even in 2016, there were occasional reports of piston sticking with the new -167 piston.
23131464167 is the latest version, a one-piece throwout bearing. As noted, these have been reported as sometimes being too large to fit, or, expand when hot, and you have the same old problems. Get a proper one, or machine down (sand, etc.) to fit. If your model had a bushing on the original push rod, that is not needed and must be removed. Otherwise, replace the clutch rod at the same time, as it made for the new 167 part.
It appears that BMW has made the -167 piston assembly in TWO diameters, and only the smaller one works well.....so, if yours is new, and over 28.5 mm, I suggest you sand it down and see how it fits.
|
At this point, I think it appropriate to caution that if your clutch operation becomes faulty in some way after the engine is fully heated-up, the throwout bearing & piston unit should be checked to see if it fits OK cold; &, again checked when the engine and transmission is quite hot from a reasonably long ride, perhaps 20 miles. If the clutch is not properly adjusted, usually indicated by no free play, hot or cold, at the bar lever, the throwout bearing will wear out rapidly. Best clutch operation is had with proper adjustments, at the transmission clutch lever & the bars & is outlined in this article. |
My described 'sanding' modification can be done on a lathe with some sanding paper, & you can hold onto both ends of the piston; you can also chuck the rather short shaft tip end in a drill press & use some rather fine sandpaper for the job; which also takes only a few minutes. The drill press chuck won't grab strongly on that very short tip, so don't over pressure with sandpaper, &, take your time. The sandpaper & throwout unit should be DRY, NOT lubricated, during the sanding. Use a micrometer or vernier caliper to first measure the piston diameter, & repeated measurements as you sand it down, which happens very slowly. Use a moderate speed of rotation. I usually just do this, rather than replace the assembly ...as noted, there have been similar problems with the new type, and it takes me only minutes to sand the original. A shop probably would not sand the old part, but replace it with the updated part ...BUT ...I am not convinced every new part is good.
Do, however, inspect the bearing & if it looks bad, replace it. You should grease it with a good thin petroleum grease (Do NOT use moly); because, while the bearing is theoretically ultimately lubricated by oil from the transmission, that does NOT happen for some miles after initial assembly.
NOTE that these bearings, whether ball type, or needles type, can fail. Most of the time the failure is not due to what you might think (although
the bearing will be damaged, if not lubricated upon installation). The problem is that the transmission oil became contaminated by moisture. Transmission oil is moisture contaminated due to any combination of the following factors:
Short trips; leaking speedometer cable boot at the right rear top area; water hose has forced water into transmission via the hollow bolt at the battery cable. Very rarely it comes from water in the bottom of the air cleaner area, where a 13 mm (head) bolt screws into the transmission. Contrary to old BMW recommendations, I suggest gooping the bolt threads, even under the bolt head (washer too), with a modest amount of Permatex NON-permanent version of Form-a-Gasket.
The 4 speed transmission had a balls type throw-out bearing; the 5 speed transmission (1974+) had a radial needle bearing type; in September of 1980 BMW went back to a ball bearing, of a new design. Can you figure out why a radial needle bearing is a poor design (but CAN work adequately), as far as pure engineering is concerned? ....think, ....then read the next paragraph.
((( thinking time ....thinking time ....1, 2, 3, 4.... )))
The radial needle style of bearing for a throwout bearing in an Airhead is a POOR design, but works OK most of the time.
When radial needle bearings, where the tiny rollers are equal in size from end to end, are pressured (say, by a flat plate) & rotated circularly, the needles try to rotate at the same speed at both ends, well, over full length, of each needle ....that is, from end to end of each individual needle. This is not possible, if you think about it, because they are arranged in a circle ....so they scrape around ....forcing any grease or oil out. But, the bearings are not being constantly rotated, only when the clutch is used, & when the transmission oil hopefully lubricates the bearing. Thus, the bearing does hold up OK most of the time. See downwards a couple of paragraphs, for exceptions. If the grease or transmission oil is not there, & a little moisture condenses there, or excessive clutch hold-in times are often used; and/or combinations of these things, including old contaminated oil, ....the bearing can start to deplete its lubrication, & actually freeze up. That is even more likely for dirt riders who use the clutch to control speed.The clutch pushrods in the 4 speed transmission & the early 5 speed transmission had felts located in a pushrod groove, & are best installed from the front. Later ones must not be installed from the front.
Below is a picture of a 1982 felt-less clutch rod, the superior type ball bearing, piston with plastic outer, the internal spring, a new rubber accordion cup, and the band-clamp. The rod is about 9 inches long; the piston cup is about 17/32" wide on the dark plastic portion.
The bearing is lubricated with transmission oil during operation; but that takes time & miles after the greased throwout bearing is installed. I always use a very light NON-moly grease when installing this bearing. The "felt-less' clutch rods came in 1981. Prior models of clutch rod had a felt, 23-21-1-230-440, which is best installed on the rod, & the rod inserted from the FRONT of the transmission. It is possible from the rear, with a homemade tool, but I very much recommend against it, due to possible damage to the buried rear seal. To explain this a bit more thoroughly, the 1981 & later models have a lipped seal at the rear cover, 23-12-1-243-522. It is not easily replaced ....the transmission must come apart. Install the pushrod, oiled, from the rear, rotating it a bit to avoid damaging the seal (which you will, if you install from the front like on earlier transmissions).
The felt IS necessary on models prior to 1981, otherwise the clutch can become oiled; thereby slip, & be ruined eventually.

WARNINGS ABOUT THE CLUTCH ACTUATING ARM AT THE REAR OF THE TRANSMISSION:
Earliest models, the /5 that is, had the clutch actuating arm lever at the rear of the transmission secured to the transmission rear cover tower bosses via a pin secured by a cotter key, a very reliable method. Later, but still relatively early models, used a pin that did not have a cotter key, but used a C-clip fitted into a groove machined into the outside of the pin. If the C-clip came loose, the pin could come upwards out of the lower boss; usually it came upwards just enough to no longer be inserted into the lower boss. The next clutch application often broke off that lower transmission boss ear. The result necessitated a transmission overhaul ....or some inert gas welding at a minimum for a permanent fix (temporary fixes are of several types, not treated here). Usually the breakage happened while you were shifting, going down the road; and did not happen in your garage. This meant that the broken ear was lost ...so it now was more complicated to get back on the road. Replacing a rear cover means re-shimming the transmission; so you might as well fully overhaul it. Fixing the problem before it can happen, costs VERY LITTLE, & can save you a HUGE amount of money ...not to mention headaches of being stranded.
THE PRE-PROBLEM INEXPENSIVE FIX:MISCL.:
BMW had a Service Information bulletin (we call them SI's), November 1991, #11-049-91, sub-number 2495, this can also be seen on the 12/92 fiche on page 3, G23. Basically, it stated that while the flywheel bolts were previously at ~75 foot-pounds (100 Nm), they were now to be at 90 foot-pounds (125 Nm). You were to first clean the threads, & the threads were to be OILED! BMW specifically said that the bolt limits would NOT reach their limit of elasticity at that torque, and could be REUSED! I will NOT tighten them that tight. Makes me nervous! However, some, including at least one well-respected servicer, do tighten them that tight, & I have heard of no problems reported, including from him. It is YOUR CHOICE. NOTE also that this is in regards to the 11 mm bolts, & applies to 1981+ models ....certainly not to the smaller /5 and early /6 (10 mm) bolts; which need replacement upon each use, which the 11 mm do not. The 10 mm bolts in the /5 & early /6, are absolutely NOT to be torqued to such high values.
There have been many different specifications on flywheel bolt torque values over the years. There were two lengths of 10 mm bolts used. I use, clean & dry (or the faintest trace of oil), torques of 42-45 foot-pounds on the 1973 & earlier engines using 10 mm diameter bolts. For the 1974 I use 52-55 ftlbs; for 1975 & later up to the 1981 models, I use about 75 to 80 ftlbs. I use about 80 ftlbs, clean & dry threads, on 1981+. I am OK with the values even if faintly oily.
Grabby Clutch:
If your clutch is grabby, it can be due to a number of causes. It is IMPORTANT that the transmission input shaft splines be regularly lubricated. When they get dry and the grease has disappeared, and probably there is rust to be seen, the shifting is stiff, poor, and it may be somewhat difficult to get from 2nd gear down to 1st gear, or just to engage 1st. While you could put a faint coating of a dry, or even a grease type moly on the friction disc splines, I generally recommend you do not, as I worry you will over lubricate the disc splines, leading to lubricant on the friction portion of the disc. So, I usually say to never lube the disc spline, just the transmission input spline (for that you must use a moly grease). Cleaning & re-lubrication of the splines should be done at a mileage & time commensurate with your driving habits & atmospheric conditions & the condition in which you find the splines during the servicing. Moisture condenses, during cooling of the engine, onto the shaft. With the in-out movement of the spline parts during operation of the clutch & thus wiping action of the essentially gear-like teeth under torque, ....all conspire to move grease out of the splines. Late input shaft splines were supposedly nickel-plated, hold up better & longer, regarding lubrication. Spline wear, if not lubricated to reduce or eliminate it, can lead to spline failure, which can strand you on the road, and will be a $$$ situation.
I suggest a look-see & cleaning & initial lubrication of the transmission input splines at 15,000 miles since last cleaning & lubrication, & then adjust the mileage for the next following time, depending on condition and little change in location (regarding humidity) and riding habits. The models built before ~1993 had UNplated transmission input shafts, and required cleaning and relubing of the splines more often.
End play on the transmission input shaft can cause a quite-grabby clutch operation; that can happen cold and/or hot. More often when hot. To fix that, one must remove & open the transmission & work on the shaft shimming. One can get an idea if that is a problem by removing the transmission, heating it to about the temperature of boiling water, & measuring, with a dial indicator, the input shaft end play. Anything over a few thousandths of an inch is suspect. This problem with transmissions causing a grabby clutch is not overly common, but it seems to be more-so for the 1979 models. Grabby clutches can also come from a somewhat rarer problem, the crankshaft has excessive end play. https://bmwmotorcycletech.info/flywheelremovalwarning.htm has information on fixing that problem.
It is possible for a bad throwout bearing to cause a grabby clutch.
Recommended greases for the splines:
Because of my & others' extensive testing of spline lubricants over many years, & still going-on, I have removed all grease & greasing methods from this article you are reading, & placed them at https://bmwmotorcycletech.info/chemicalsetc.htm. You will find ALL the information at item #6A in that article. Please read it carefully & fully ...and, it is long.
EZ-Clutch (and variations):
The pre-1981 clutches have a heavier pull at the handlebars, some dislike that, or cannot easily physically cope with it. There are several types of modifications to fix this, besides the very large expense of installing a 1981+ clutch with its necessary input splines shaft length transmission work. Modifications involve a single pulley device or a lever arrangement. One that is available for purchase is from
Craig Vechorik ('Vetch'), dba Bench Mark Works, (662) 465-6444; located in the USA.
www.benchmarkworks.com/articles/howto/clutch.html. Bench Mark Works also has it available from their place in Canada.
https://shop.maxbmw.com/fiche/PartsDetails.aspx?source=catalog&brand=BMW&diagram=PE_easyclutch
Do not install an EZ clutch pulley system until you are sure the problem is not in the clutch lever, clutch cable, etc.
A factory or aftermarket tool may be used to centralize the friction disc when assembling the clutch. Centralizing is needed to enable the transmission input shaft splines to line-up with the clutch disc splines. However, your eyeball is good enough if careful. If you have a lathe and want to make this tool, it is, overall, is ~133 mm long; the length is not critical. In fact, hardly anything is critical. I do suggest making the 20.7 mm diameter, as shown in the sketch, reasonably close to that. My measurements were from my BMW factory tool: https://bmwmotorcycletech.info/CLUTCH-TOOL.pdf
Here is a photo of all factory-type tools for the clutch:
https://bmwmotorcycletech.info/ClutchFlywheelTools.jpg
The threaded release tools are useful for the /5 clutch, but you do not need to have the special tools. You can can fashion something to hold any of the clutches from rotating while R/R bolts. You can use long cheap hardware store bolts & nuts to release the /5 clutch ...etc. ...all as described earlier in this article.
Here is a hyperlink to my tools article: https://bmwmotorcycletech.info/tools.htm. In that article will also be found information on clutch removal and assembly tools.
The disc locating tool:
https://bmwmotorcycletech.info/CLUTCH-TOOL.pdf
Here is a link to a site that has well-designed clutch tools (and, most every special tool you might want for your Airheads), highly recommended! Previously owned by Ed Korn. Many of the tools on this site are quite cleverly designed and the tools are well-built:
http://www.cycleworks.net HIGHLY RECOMMENDED SOURCE!!
Here is a link to an aftermarket clutch disc centering tool: http://www.northwoodsairheads.com
ASSEMBLING THE CLUTCH:
Note: If you are assembling the later clutch carrier type of clutch, you may want to watch the video in this article by Brook Reams:
https://brook.reams.me/bmw-motorcycle-rebuilds/1983-bmw-r100rs-rebuild-project-index/21-bmw-1983-r100rs-install-clutch/
As previously noted in this article, the 1981 & later models have a lipped seal at the rear cover of the transmission, and it is not easily replaced ....the transmission must come apart. This lipped seal at the rear is for the clutch-operating pushrod; while in earlier models the pushrod had a felt seal in a wide groove in the pushrod. Install 1981 & later pushrods, oiled, FROM THE REAR, rotating it a bit, to avoid damaging the seal (which you will, if you install from the front, as is properly done on earlier transmissions)
When you disassemble a clutch, for whatever reason, one of the things done is to check the friction disc for thickness. This means from one side to the other. I do it near the outer edge, and at about 3/4 of the way towards the center of the linings. Other checks are the spring (relaxed mode) height, & condition of the other parts in the clutch assembly. New friction discs are about 6 mm thickness with some variation, fractions of a mm, over the years. BMW says to replace the disc at 4.50 mm. On an Airhead, getting to the clutch is fairly easy, so whether or not to replace a disc at 5 mm or even less, is a judgment call. You might consider letting it go, so long as the clutch is not slipping in top gear with heavy throttle & goodly rpm, all of which are worst case for slippage to occur.
One of the decisions to be made is what other parts need replacing (if any), when the friction disc is going to be replaced. You may hear advice to replace all parts that push against either side of the disc. But, how do you know? There are no specifications on the dishing type of wear that is one of the main reasons to replace those parts (& deep scoring, etc.). Some of us know what works, & what does not, & we might check 'dishing' with feeler gauges on a precision flat surface.
Here comes some hints...
Measure the disc friction area (both sides at same time) near the disc very outer area, then in somewhat, & then near the inner area. Do this with a micrometer, not the wide jaws of a vernier caliper. You may have to make up something to allow measurements near the hub. If the thickness is pretty good for all three checks, you are likely not going to need other clutch parts. How much
difference is allowable? Maybe 0.015" is about the maximum (in general).... but I have seen more that was still OK.
Many folks just replace the disc, & then soon have to do a clutch job all over again, due to not checking the wear on the other parts. If the clutch parts are not "OK" flat, you can contact such as Southland Clutch to machine your plate & make you a thicker disc to compensate for that machining; or, you can, of course, purchase new BMW parts. Southland Clutch; 101 E. 18th St., National City, CA, 91950, (619) 477-2105, can resurface all models of Airhead worn clutch parts & supply the thicker clutch disc that is needed after those operations. Dan Levine. [email protected]
During your assembly (don't forget previous information on marking the parts & 120° assembly), I suggest you coat the edge of the diaphragm spring where it touches the flywheel & the fingertips areas too, all with moly grease/paste ....and
not very much! This will help the spring fit properly & operate smoothly. Remember: not much, because more is not better!
Pre-1981 clutch hint: Before you do the final torquing of the bolts; and, with the bolts lightly tightened, set up a dial indicator on the clutch. Be careful where the indicator is touching. Rotate the engine slowly, taking readings on the dial indicator. You may find that the clutch is not as concentric to the engine case as you'd like....or; as is possible (read on.....). One of the secrets of getting extra smoothness to the engine is, perhaps, not what you might think. Yes, you can balance pistons, rods, etc. Yes, you can have a flywheel and clutch separately balanced by a balancing company. Yes, you can have them assemble and re-balance as a complete assembly. However, if you try what I am suggesting here, you will probably find a noticeable increase in engine smoothness. Your clutch was balanced at the factory, and assembly marks were placed on it by BMW. These marks are to be at 120° apart. After you assemble the clutch, and have the bolts lightly tightened, and the dial indicator is mounted to the engine case, ....you can get the clutch to be better concentrically, on the pre-1981 models! To do do that, adjust the clutch, using a pry bar, to better center the clutch on the clutch bolts. Do not do this on the later lighter clutch assembly (clutch carrier models). Try to get minimum non-concentricity.
Basics:
Align the friction disc by eyeball or tool. Evenly torque the clutch bolts. For pre-1981 models you need some sort of long bolts & some spacers from a hardware store unless you have the BMW or equivalent tools. I mentioned those long bolts earlier, ...in order to get the pre-1981 clutch to assemble to the point you can use its original bolts. You don't need more than 3 of these long bolts as the clutch has
6 normal bolts, the three can be spread at 120° ...you will also need spacers for them. Install these long bolts evenly, criss-crossing while tightening them evenly, bit by bit, until the clutch is pulled together moderately. Then install the 3 missing original bolts; torque them properly one by one. Then remove the added bolts and install the original bolts. For the 1981+ clutch, you do not need special assembly bolts, simply replace the clutch bolts and the special vibration-proof washers. Mind what I said about concentricity adjustment on the pre-1981 clutches, before the final torquing.
FLYWHEELS, CLUTCHES, AND THEIR VARIOUS BOLTS:
HINT!.....The early R65 and R45 had smaller clutches than the larger engines did. The amount to torque the clutch bolts to the flywheel is NOT listed in early BMW literature; & is wrong in some later literature. There is some confusion over this. BMW originally had Allen head bolts, then later went to hex head bolts. I suggest using the hex head bolts.
For the R65 and R45, I suggest using 88 inch-pounds for the clutch mounting. Use an inch-pound wrench because many foot-pound wrenches are not accurate at a 7.3 foot-pounds setting
For the larger engines (before the 1980 change to the 'new style' clutch carrier (flywheel) I suggest 16.6 foot-pounds for the clutch mounting.
For the new style clutch (using the clutch carrier) from sometime in 1980, use 15 foot-pounds.
Use clean & dry
threads, then coat before assembly with a light amount of Loctite BLUE, a medium strength type.
Did you have the flywheel off? Engine rotated some? Need to find out which crankshaft bolt holes & flywheel holes should be lined up?
"I removed the fly wheel at top dead center (OT mark) but when I installed the seal with the installation tool I ended up rotating the crank. How can I ensure that I am at top dead center so I can reinstall the fly wheel correctly?"
Here is an edited reply I did to the Airheads List:
Since you have the flywheel off, I certainly hope you have a crankshaft stop of some sort at the alternator bolt. If you did not, you are in danger of doing major damage as you re-install the flywheel....so, do it...and hopefully the crank has not already moved forward. If you think it moved forward, see my article & the sketch from Tom Cutter ....both are on my website. It is Article 60, sub-section 2. A direct link: https://bmwmotorcycletech.info/flywheelremovalwarning.htm
I am not in favor of removing that crank stop (so as to turn the engine with the rotor bolt) to find TDC, because if you allowed the crankshaft to move forward, you could be in a world of trouble. The safest method would probably be the following procedure, which takes all factors into account, including rotor bolt threads direction for tightening/loosening. READ THIS ENTIRE SECTION BEFORE DOING THIS PROCEDURE.
1. Remove the valve cover on the left cylinder & remove left & right cylinder spark plugs so the engine is easy to rotate. Remove the rubber plug that covers the timing window, located slightly rearward of the oil level dipstick.
2. Place the flywheel into any bolt-hole positioning, lightly putting in a few bolts.
3. Rotate the flywheel slowly in the normal direction, which is anti-clockwise as you face the flywheel from the rear. Watch as the left exhaust valve closes. Then, rotate more & watch the left intake valve. After the intake valve closes, continue to rotate ...in small amounts ....shining a flashlight into the spark plug hole. You will see the piston then come fully out, then reverse and begin to go inwards. The pushrods, piston at, near or fully outwards, should be easy to rotate by your fingertips (assuming valves were set properly). A double check is that both valves are fully closed.
You can skip removing the valve cover in step 1, & then skip step 3, if you feel OK about 'feeling' for the piston coming outwards. It does not matter which stroke you are on, just that the piston is close to being fully outwards. I often do it with the round-tipped tommy-bar in the standard tool kit, through the spark plug hole. Turn the engine (if you do it this way), VERY SLOWLY AND GENTLY so as to not let the tommy bar hang-up & injure the spark plug threaded-hole metal. DO NOT USE A PENCIL FOR THIS, IT COULD BREAK!
4. Rotate the flywheel back and forth ...CW & CCW ...in small amounts until the piston is fully outwards, eyeballing it is good enough.
NERDY: There is an explanation that could include the 72° per bolt hole; but, a fuller explanation would include it being less because the piston moves rather slower than those degrees might tell you, as the piston comes out and near OT (the piston rod is extended), but we can disregard that here. We can also disregard using a dial indicator, etc.
5. With the piston now ~fully outward, if the OT mark on the flywheel or clutch carrier is not someplace in or near the timing window next to the oil dipstick, remove the flywheel & reposition it so OT is in the timing window, or very close to being in the timing window.
HINT: There may be a TINY amount of rotational free-play in the flywheel with all five bolts screwed-in, but still a fraction of a turn loose. Try to center the flywheel in that free-play area, before beginning to torque its bolts.
FLYWHEEL BOLT TORQUES:
Early /5/6....to 1974 had five 10 mm flywheel bolts used on 93 tooth flywheels. There were two lengths installed. I will not reuse them. Torque them to book specifications, dry or only very slightly oily. The flywheel was 11-22-1-256-966.
/6 in 1975 and 1976 had five 11 mm flywheel bolts used on a 93 tooth flywheel. The flywheel was 11-22-1-262-070. 11 mm bolts were used on all later models. Read on for torque.
/7 for 1977 through early 1978, NON-emissions timing bikes had five 11 mm flywheel bolts on 111 tooth flywheels. The flywheel was 11-22-1-263-788. Read on for torque.
1978-1980 WITH emissions timing bikes had five 11 mm flywheel bolts on 111 tooth flywheels. The flywheel was 11-22-1-336-380. Read on for torque.
Flywheel mounting uses the mentioned larger 11 mm bolts on all models after the 1975 change from 10 mm bolts. Threads were originally to be clean & dry.
BMW Service Information bulletin (we call them SI's), November 1991, #11-049-91, sub number 2495, & this can also be seen on the 12/92 fiche on page 3, G23: Basically, it stated that while the flywheel bolts were previously at ~75 foot-pounds (100 Nm), they were now to be at 90 foot-pounds (125 Nm), this is with cleaned threads, BUT... the threads were to be OILED! BMW specifically said that the bolt limits would NOT reach their limit of elasticity at that torque, & could be REUSED! I will NOT tighten them that tight. Makes me nervous! However, some do, and I have heard of no problems reported. It is YOUR CHOICE. NOTE also that this is in regards to only the 11 mm bolts, & applies to 1981+ models ....certainly not the smaller /5 10 mm bolts, nor the very early /6 10 mm bolts; which need replacement upon each use, which the 11 mm do not unless damaged. Those early 10 mm bolts on the /5 & early /6 are absolutely not to be torqued to such high values. BMW did not explain why earlier than 1981 11 mm bolts were not included in their new recommendations.
I use, clean & dry (or faintly oiled, by cleaning the threads with kerosene with a small amount of oil in it), torques of 42-45 foot-pounds on the 1973 & earlier engines. For the 1974 I use 52-55 ftlbs. For 1975 & later up to the 1981 models, I use about 75 to 80 ftlbs. I use about 80 ftlbs, clean & dry threads, on 1981+, but am OK with slightly oilier, if you wish. You could certainly just use 45 to 50 ftlbs on the early 10 mm bolt engines, and 80, oiled, on the 11 mm bolts, but be cautious.
Clutch Cables. Problems. Clutch Adjustments:
Cables:
32-73-2-324-956 cable is 1460 mm or 1495 mm long; the sheath is 1285 mm long. This cable may have been 32-72-1-235-744 ?
32-73-1-230-041 cable is 1320 mm long; the sheath portion is 1085 mm long
32-73-1-230-042 cable is 1460 mm long; the sheath portion is 1225 mm long
32-73-2-324-959 is 1361 (1386??) mm long, sheath is 1130 mm. Needs confirmation. R45/R65
32-73-1-237-694 is 1495 mm long, sheath is 1242 mm ???. Needs confirmation. R45/65, hi bars
32-73-2-324-956 cable is 1520 mm long, the sheath is 1285, used on GSPD, some others.
32-73-2-324-960 is 1625 mm and is on K1100LT
32-73-2-324-957 is 1436 overall, sheath 1180 (??), used on R80, R100, R100 Mystic, with hi bars.
32-73-2-324-958 is 1410 mm overall long, sheath portion is 1155 mm long (??). Used on R80, R100, R100 Mystic, with low bars.
The above information could have errors.
I have a LOT MORE information on various clutch cables, used with various bars, etc.
See www.siebenrock.comfor more control cable information.
See Anton's website for his information, on many cables, and he may be measuring/showing differently:
http://largiader.com
Below is a snippet copy from my control cables article covering why cable problems arise. Below this boxed area are more details.
| 1. Throttle cables on Airheads: LEFT cable fails at the carburetor due to the throttle cable being bent during accessing the oil dipstick.
2. Worn bushing at the clutch lever casting assembly at the handlebars that the clutch lever rides on. A Nylon-like material). The result is the lever being able to move up and down, allowing angular lever motion. If loose enough, the stranded core of the cable will start rubbing on the sharp-edged guiding slot in the lever. Eventually a strand will break, failure came soon as more strands broke. The bushings are easy to replace and not expensive. They may require slight reaming to fit. The sharp-edged slot can be filed smooth. The lever assembly requires a special waverly washer in a slightly depressed area. 3. Poorly made cables, & not always aftermarket types; they can be from BMW. The areas of poor cable manufacture are generally at the barrel tip area; some minor hand work will fix it. Be sure the cable end barrel's can rotate smoothly & hand file the barrel, sometimes the crimped part at the end needs attention too. 4. BMW cables (except original issue very early /5) are plastic-lined & last a long time, & should operate very smoothly, with little friction. Lubricate barrels with moly grease or moly-oil during assembly. This also applies after gunk/wash jobs: re-lube metal barrels! In some instances the half-rounded area of the fork in the clutch lever at the transmission where the barrel fits, fits too tightly. I don't modify those barrels, instead I modify the half-round clutch lever area....as I have found nearly all cable barrels fit a bit too snugly there. 5. Failure to route the cable properly ...typically resulting in too-tight bends or insufficient flexibility, due to using too many cable ties to the frame (only one for the clutch cable), etc. 6. Lubricating BMW cables innards. Lubrication attracts abrasive dirt and may (?) swell the liner (a Nylon-like material). Do not lubricate cable innards. The only exception is if you have the original UNlined cables, which were only installed on the early /5 motorcycles; and have not been available for decades. |
***Breaking Clutch cables often? ....see above boxed area ....and below:
BMW clutch cables, as I have noted above, are lined with a plastic material and you should not oil the innards. The ONE exception was the earliest /5 bikes, which came from the factory without the Nylon-like internal lining. I suspect only a few very low mileage /5 bikes are around these days with those earliest cables. Aftermarket cables generally do not generally last very long, and do not operate as smoothly, as they do not have such linings.
BMW's cable suppliers have sometimes done a lousy job. Some BMW replacement cable barrels do not rotate smoothly; you should file the barrels so they do. Watch out for problems with the top crimped portion at the handlebars, if the area does not fit the lever slot properly; there can be interference; the cable will foul on the lever. Be sure to fix that immediately and use a fine not coarse file. Another problem (reported to me) has been mismarked cables, that is, they are wrong lengths.
Be sure the clutch cable is routed properly, & tied down only once at the frame. That tie, which must be only barely moderately tight, should be located roughly midway down the right side frame down-tube.
There must be no broken cable strands.
The clutch lever at the bars should not have excessive angular up & down free-play; if it does, the nylon bushing in the handlebars lever area needs replacing; make sure the waverly washer is in the lever area depression area for it. Be sure that with lever movement in any direction (in-out, up-down, angular) the inner cable strands are not being rubbed against by the clutch lever slot. Be sure the barrel rotates easily ...lubricate the barrel and the transmission ends with moly grease. If the barrels do not rotate quite smoothly, fix the barrels or the transmission lever curved area (many are very slightly too small in curved area size).
The adjustment is not supposed to be exactly the same on all models, the dividing line being the 1981 models that had the new lighter clutch components. In practice, while the "new method" will work OK for all Airhead Clutches, I prefer to use the old adjustment method for the early clutches. The 1981+ clutch adjustment must be made with the new method. My recommendations follow:
1. For pre-1981 clutches (some few 1980 had the later clutch with clutch carrier, etc.):
The adjustment at the lever at the back of the transmission sets the free-play clearance at the handlebars lever; the adjustment of the outer cable sheath at the handlebars lever sets the angle/distance of the lever at the back of the transmission. You want to end up with about 3 mm free play at the bars lever junction, that is, the outer angle of the lever to casting assembly. When the bars lever is ~ half-way through its actual pressure range, the clutch lever at the rear of the transmission should be approximately parallel with the transmission rear case. When you are done you should also have ~2 mm of free play at the lever at the transmission rear cover.
2. For 1981+ clutches the adjustments are done differently:
The difference is that the distance measured from the forward surface end of the barrel in the fork of the transmission-located lever, to transmission case where the cable comes rearward-through, should be 201 mm. There are also factory books that say 201 to 203 mm. BMW was never really clear on what part of that barrel the measurement was to be from ...rear edge? middle? forward edge? As I noted, use the forward part of the barrel. The TOP cable adjustment ...yes, at the handlebars, ...sets that 201 mm (7.91 inches) distance. I find it very convenient to cut a piece of welding rod or metal coat hangar to 201 mm, and keep it as a tool.
The next adjustment is the bolt & its locking nut in the clutch lever at the transmission. Adjust for 3 mm of free play at the handlebars lever where the lever meets the assembly casting. If you do not know how to do this, loosen the adjustment at the transmission lever a fair amount. You can now move the handlebars lever easily, & if moved far enough, you meet goodly resistance from the clutch. The amount of 'easy' movement, with NO clutch action, is to be such that the lever opening is 3 mm. Do not fail to tighten the locking nut.
When the bars lever is not being touched, the transmission lever will be ~4° leaning aft of the transmission rear cover. There is no need to try to measure that angle, just know that with #1 eyeball on the transmission lever, it is to be slightly angularly rear leaning.
Do all the clutch adjustments with the engine cool.
The reason the clutch levers are set this way is to ensure that the transmission lever operates in the most efficient leverage position together with the widest clutch plate movement.
If you do NOT adjust it this way, & have the lever too rearward on the 1981+ transmissions, the rubber boot at the transmission clutch rod area may LEAK OIL. Too far forward and you will have excessive force needed, can be harder on the clutch cable, etc.
Failure to have proper free play can lead to a slipping, overheated, and worn clutch.
Stuck Clutch:
Now & then someone will complain that their bike, after sitting for some time (this happens more often in high humidity areas), has a clutch that has "failed or is stuck". You can pull the lever back, perhaps it even feels normal, but the clutch will not release & if you put the transmission crashingly into gear, the engine stalls. This problem usually 'feels' quite different from a frozen throwout bearing; in those instances the lever won't usually pull back anything near normal, and the problem usually is when the transmission is hot from riding, but not always.
The problem is that the clutch disc has frozen to adjacent parts. You can fix this by replacing clutch parts with the latest items, which are not cheap; ...or, you can try to force the clutch to disengage. There are several methods, including pushing the bike & shifting into second gear ....etc. Do not pry at the clutch through the ignition timing hole.
I prefer to try the following things in order shown below; either method of the two shown can take up to 6 tries.
I have listed TWO methods, use either one, if one does not work, then try the other method.
Method #1:
(a) Put the bike on the center-stand; securely jack the bike at the rear frame crossover (swing arm area?), ....be sure you have the rear wheel definitely off the floor surface. Hold the front brake! Start the engine with the transmission in neutral. The idea is to have the engine a bit warmed up, so it starts more easily again ....because, the next step is to start the engine while the transmission is in first gear.
(b) Place the transmission into 1st gear. Restart the engine. Do not touch the clutch lever. At some goodly moderate rpm, the rear wheel nicely spinning, suddenly snap the throttle off (keep that front brake ON!); and, at the same time you snap the throttle off, give very hard pressure with your right foot on the rear brake. That may force the clutch to release. Try up to 6 times.
Method #2:
Warm up the engine a bit, so it will re-start easily. Push the bike to the street. Start the bike in 1st gear. Depending on model and situation, you may have to pull in the clutch lever at the bars to close a switch which allows the starter motor to crank the engine to restart the bike. Ride the bike down the street at 4000 or more rpm in first gear. You can try holding the clutch lever at the bars full backwards during all this, or, at a convenient & safe time, suddenly pull in the clutch lever at the bars ....but, the idea is that when the lever is pulled backwards, you will engage the front and rear brakes very hard. Try this up to six times. You can also try using only the rear brake, but, in any/every case.... be careful, you do not want to loose control, slide out, etc.
IF the clutch begins to work properly, I suggest you add some to your short ride, and go through the gears, and use of the clutch, a number of times, before returning home. When home, do check for proper adjustment on the clutch lever at the bars and at the transmission. The bars clutch lever cable adjustment sets the transmission lever position; and the transmission lever adjustment sets the bars lever free play amount. Do the adjustments exactly how it is outlined in this article, above.
If no luck at all, you will have to remove the transmission, & work on the clutch ...or, try prying at the clutch through the timing hole ...which I have suggested you do not, but if carefully done MIGHT work, a bit here and there, as you rotate the engine slowly a bit at a time.
| Some details to try to clean up any possible misunderstandings and complications about the clutch, part numbers, ETC: BMW has made plenty of changes to the clutch parts over the 12/69 to 1995/1996 production of Airheads. Besides the very early part numbers shown in the article, above, the original diaphragm spring from the mid-eighties was 21-21-1-242-353. That spring was not adequate, when BMW changed from asbestos friction discs to some (what?) friction disc material, due to Euro requirements about not using asbestos. BMW's initial change for that problem was the 21-21-1-338-508 heavier duty diaphragm spring. That was around the mid-eighties, and the changes to the friction disc and carrier were not done at the same time on all models. Things were phased-in. Just be cautions, thereby saving you some troubles. I have adequately described the problems with the 1981 models (actually 1981-part of 1982), when the clutch carrier (flywheel) was not rugged-enough, and it was changed. The poor clutch carrier was 21-21-1-242-372. The replacement, stiffer unit, is 21-21-1-451-511, then it became 21-21-1-338-722. When purchasing parts from BMW...or, better, your independent repair center who know the Airheads vastly better than most dealership parts departments, be sure to have a conversation over what parts were in your bike, and what should be installed. Break-in the new non-asbestos friction discs a bit gently, perhaps for the first 100 miles or so. |
Rev:
01/26/2008: All prior revisions incorporated, and much added from old obsolete engineinternals.htm.
05/04/2008: Edit section on the plastic throwout bearing piston problems.
04/16/2009: Clarify a few details. Re-arrange order of presentation of items.
10/27/2009: Clarify a few things, fix and add hyperlinks.
11/04/2009: A few additional clarifications on R65/R45 clutch bolts; and re-arrange article somewhat, it was excessively gaudy.
06/24/2010: Clean up article some.
04/29/2011: More information, such as a link to factory clutch tools picture on this site, etc. NO errors found. Strictly a clarifications.
06/16/2011: Add Stuck Clutch section, minor other clarifications, quite minor.
09/08/2011: Fix typo in part number for the early eighties heavy-duty diaphragm spring; was 2121338508, should be 21211338508.
10/02/2011: minor clarifications (which I forgot to upload for months).
03/28/2012: add note and hyperlink to my tools article.
04/08/2012: Very minor clarifications on throw-out bearings.
06/08/2012: Completely re-do the clutch levers adjustment area for clarity; clean up excessive use of fonts, colors, emphasis.
06/25/2012: Expand upon stuck clutch information.
06/28/2012: Clarify cable problems and clutch adjustment.
09/04/2012: Add section on setting flywheel & crankshaft alignment. Add QR code; change Google ads arrangement; add language button.
12/12/2012: Remove end play adjustment details, as is now in the flywheel removal article, 60-2
12/24/2012: Add paragraph on clutch wear dimensions.
04/28/2013: Clarify a few details, remove some redundancies, clean up article, add hyperlink to the disc alignment tool pdf.
05/16/2013: Expand section on throwout bearing parts, add emphasis and update due to a bad late style in a R100R that was reported.
08/15/2014: Correct item 3 from CW to CCW; correct flywheel number from -906 to -966.
03/17/2015: Make sure hyperlinks work properly.
07/22/2015: More information re: lwr end of clutch cable barrel & the arm & add section on greasing splines, removing prior information.
12/09/2015: Go through entire article. Increase font size, change separation lines, fix meta codes, duplications, etc.
02/04/2016: Begin minor updating, and completion of 12/09/2015 items not then fully finished.
05/24/2016: Font reductions; eliminate many background font color changes; update metacodes, scripts, & layout; revisions for clarity, eliminate redundancies.
05/24/2017: Expand explanation on freeing a stuck clutch.
07/11/2017: Clarify/cleanup details including cable lengths, all A/R. Reduce fonts, reduce colors, reduce bolds, fix faulty hyperlinks.
08/26/2017: Expand on aligning the pre-1981 clutches for minimal vibration by eliminating non-concentricity, and how to do it.
05/16/2018: Add note on 1981 possible faulty casting problems causing input shafts and clutch disc perpetual failures. This information was left out, long ago, by mistake.
01/28/2019: Correct clutch centering tool link and insert two places.
01/13/2020: Add link to Brook Reams article and video.
09/06/2020: Fix confusion over R45/R65 and the early clutch bolt torques; and, add a sentence on the later large engines clutch torque.....this should have gotten onto the internet in this article long ago, and the wrong article, pre-editing got published by mistake.
08/16/2023: Add Tom Cutter's verbatim comments, as on the Airheads List this date.
04/02/2024: Add Max as another source for the EZ Clutch.
Return to Technical Articles LIST Page
Return to HomePage
Last check/edit:
Tuesday, April 02, 2024